Quickstart
This section provides a step-by-step tutorial covering central features of Whole Tale. It assumes that you have already signed in.
Launching a tale
In this example, you’ll launch the LIGO Tutorial tale which runs in a classicy Jupyter Notebook environment.
Select the Public Tales tab and search for “LIGO”. Select the Run Tale button.
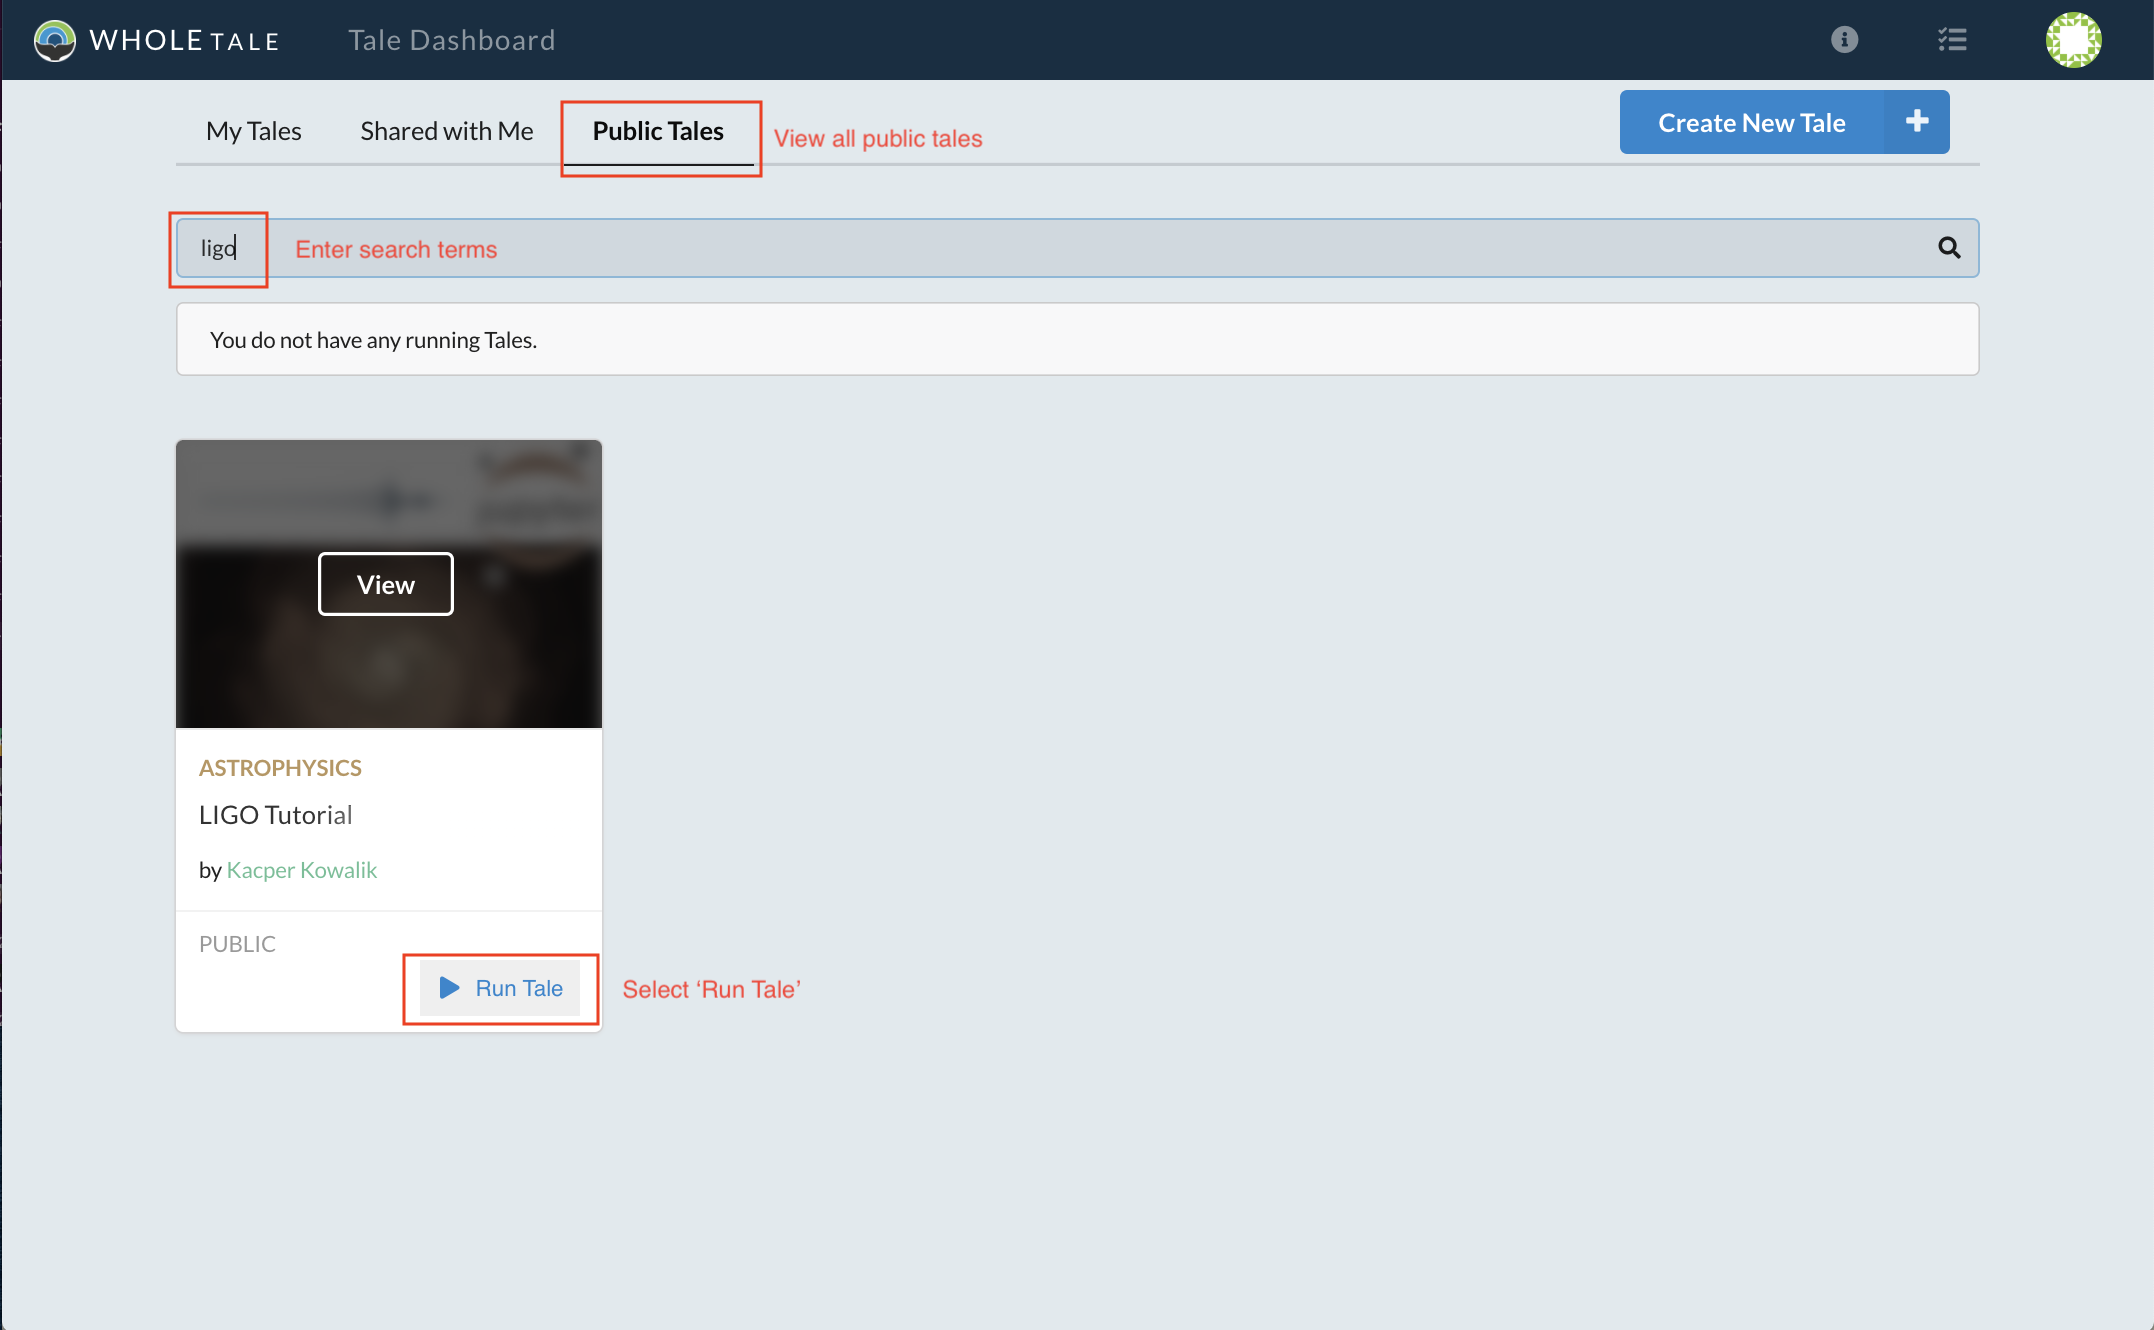
Searching for and run the LIGO Tale
Because you do not have edit permissions, you are prompted to create a copy of the Tale. Select Confirm to create your local copy.
LIGO access request
The Tale view is opened where you can access metadata, files, and launch a Jupyter instance:
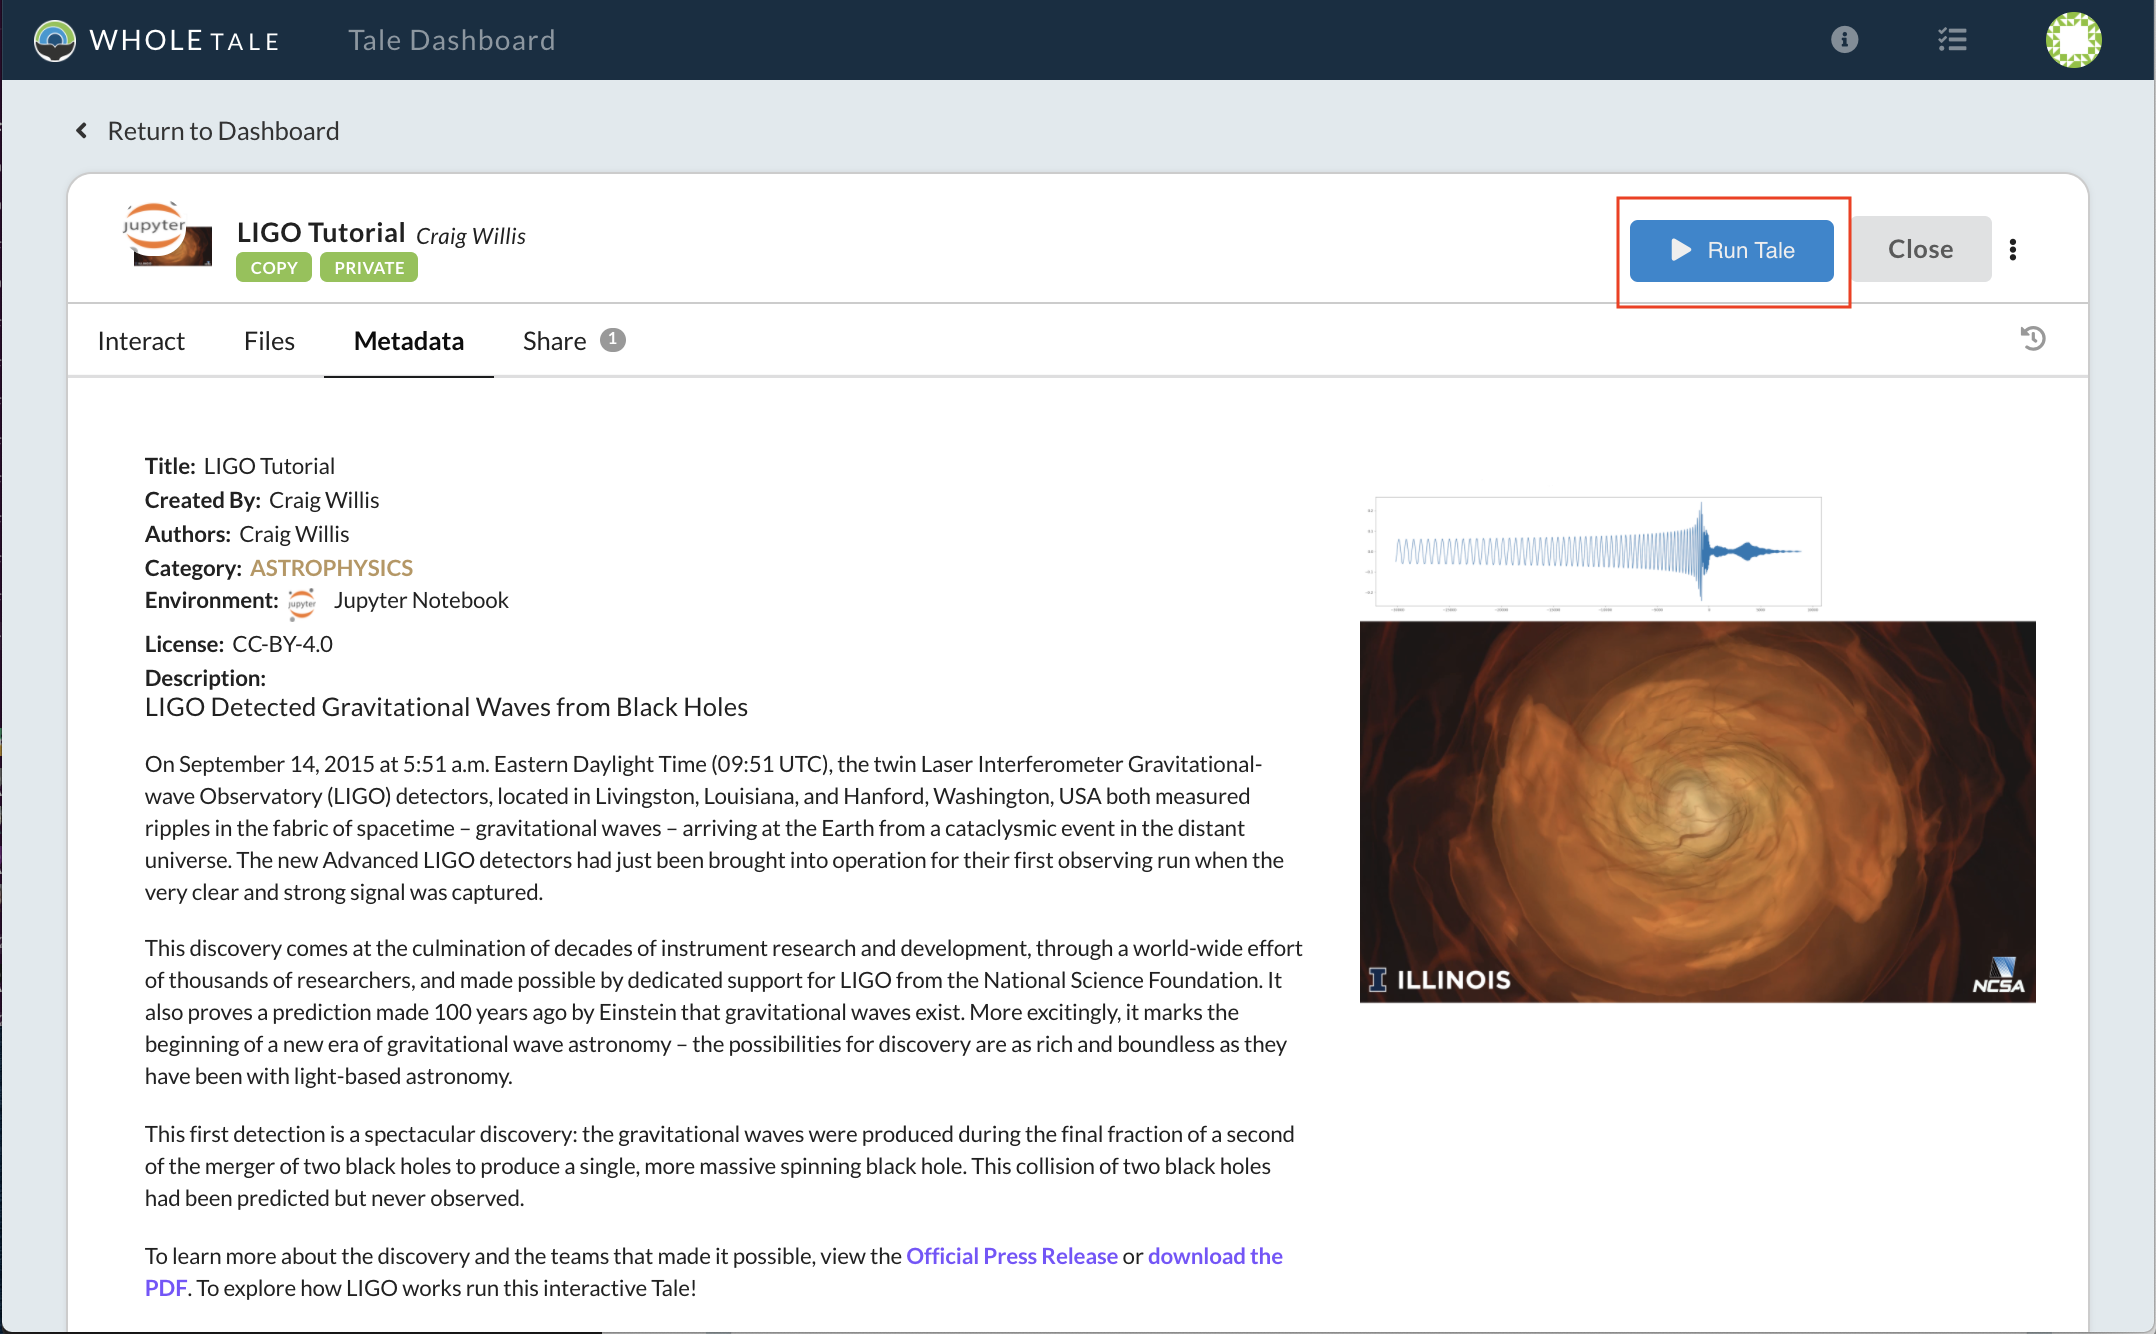
LIGO Tale metadata
Select the Run Tale button to start the Jupyter instance:
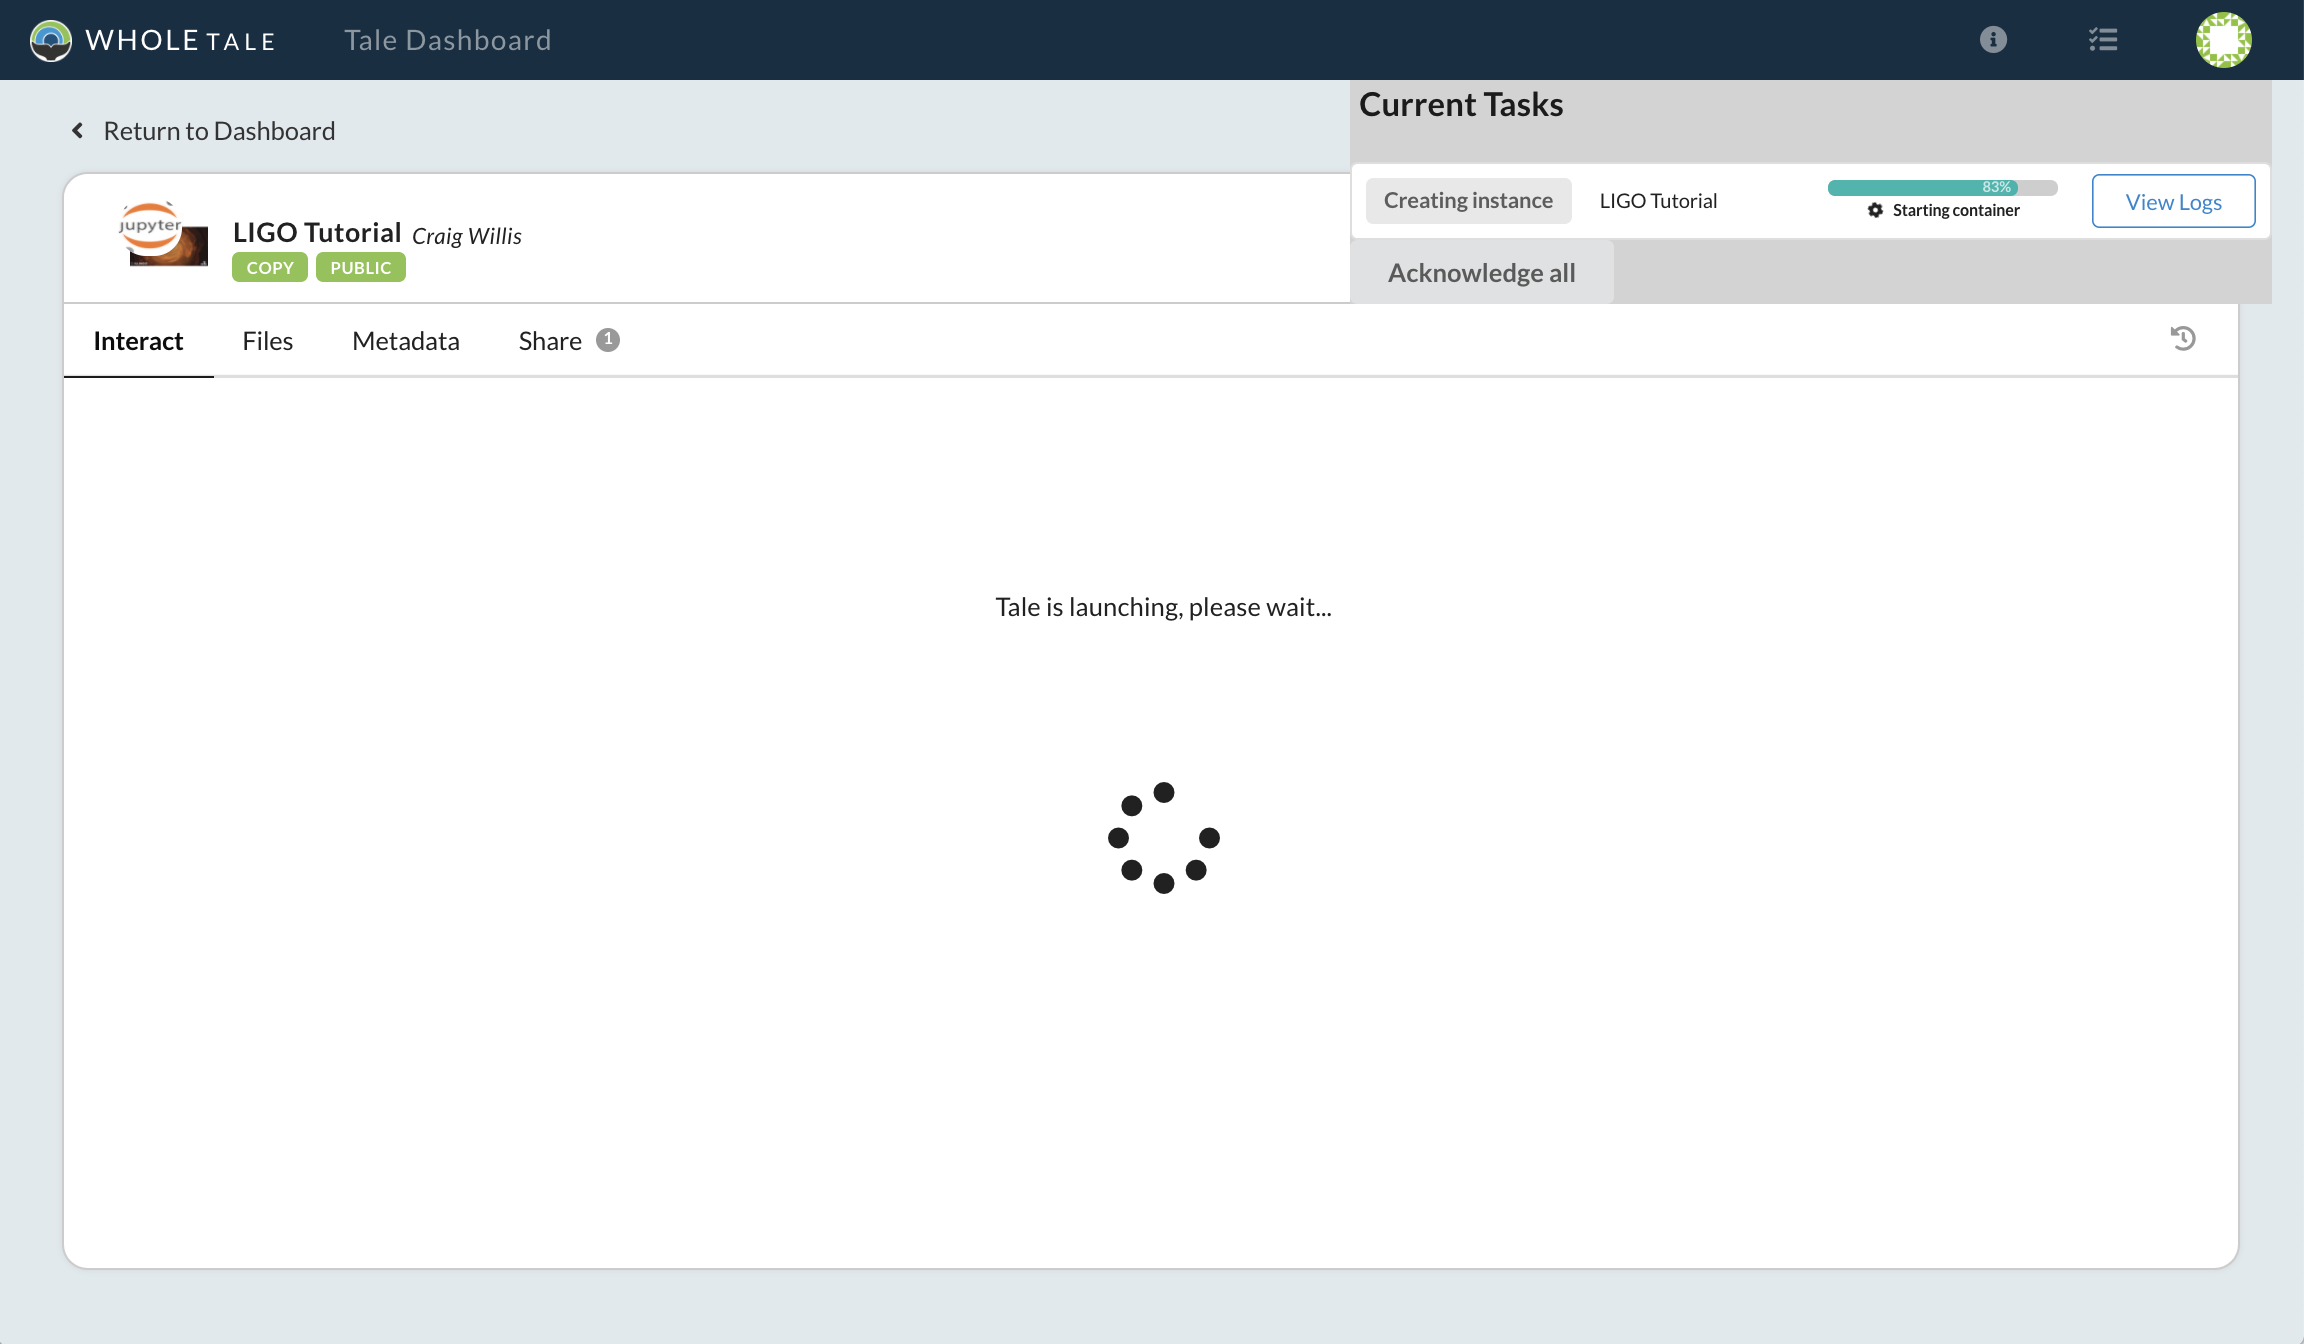
LIGO Tale creating the compute environment
Once the Jupyter instance has started, open and run the LOSC_Event_tutorial.ipynb analysis script.
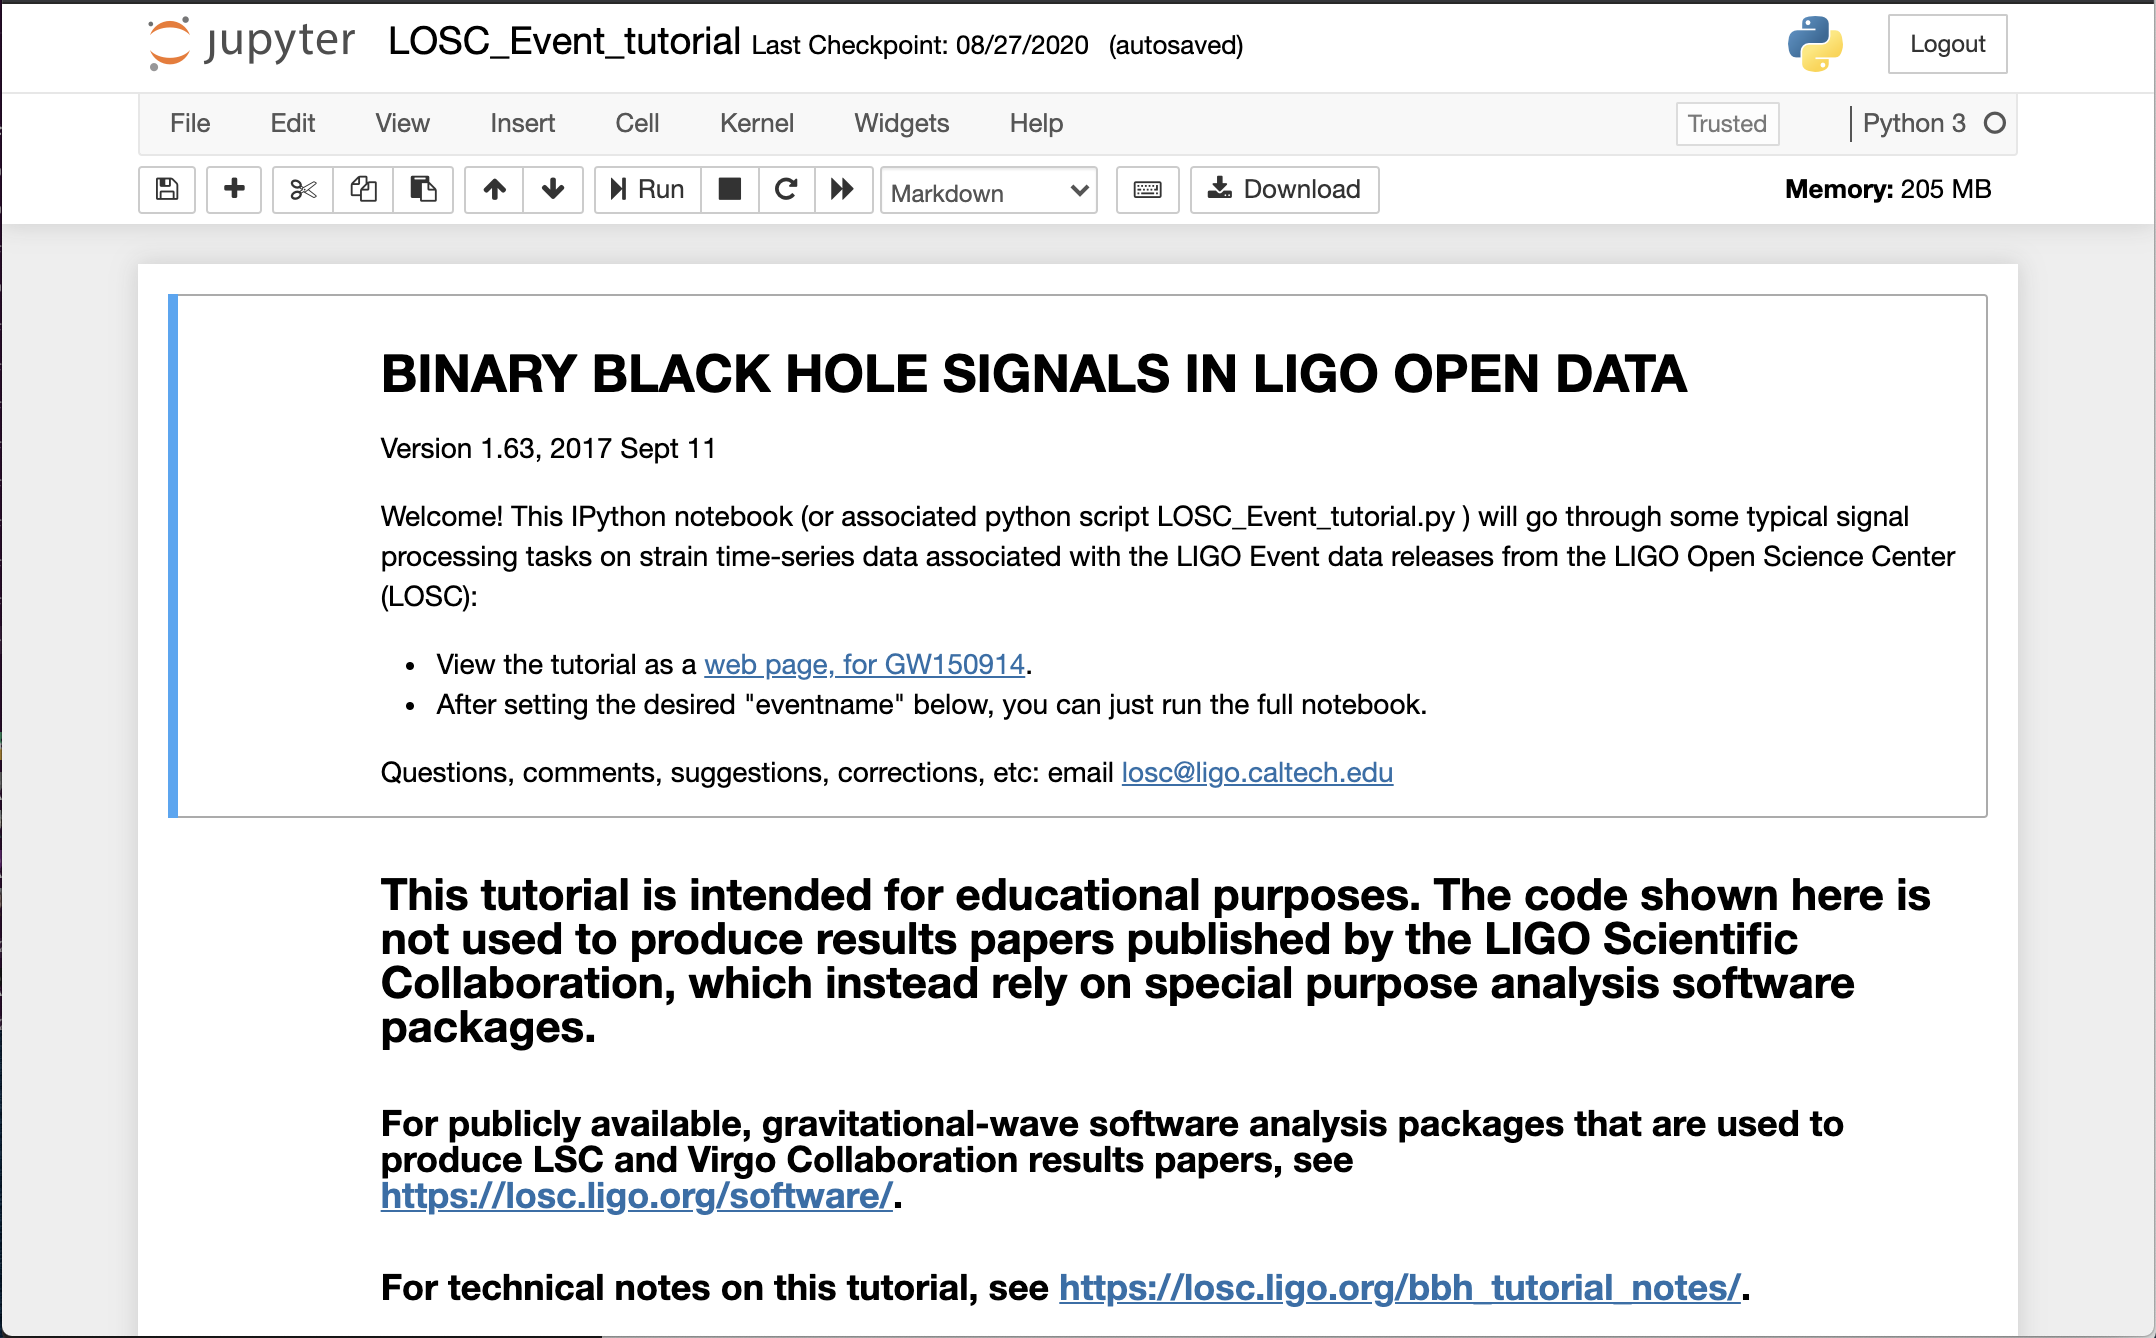
LIGO Tale running
Congratulations! You’ve successfully run your first tale.
Here’s what happened behind the scenes:
Since the original Tale is read-only for you, a copy was made that allows you to run and modify the Tale’s contents.
When you hit Run a Docker container was created using a Jupyter image containing all necessary dependencies to run the LIGO tutorial notebook, as specified by the Tale’s author.
Data for the Tale, which were originally registered by the author, are mounted read-only and available under the data directory.
Your Whole Tale home directory was mounted into home. This allows you to access personal files from within the running tale.
In the next example, you’ll create a Tale using data published in DataONE.
Creating a new tale
In this example you’ll learn how to create a new Tale based on the JupyterLab environment,
register an external dataset from DataONE, and upload analysis scripts from your local
computer. The following example files
will be used to analyze and plot the data. The zip archive also includes a postBuild and requirements.txt file which are repo2docker config files.
When the compute environment is created, requirements.txt is used to install any additional Python libraries and uses postBuild to run additional code once complete.
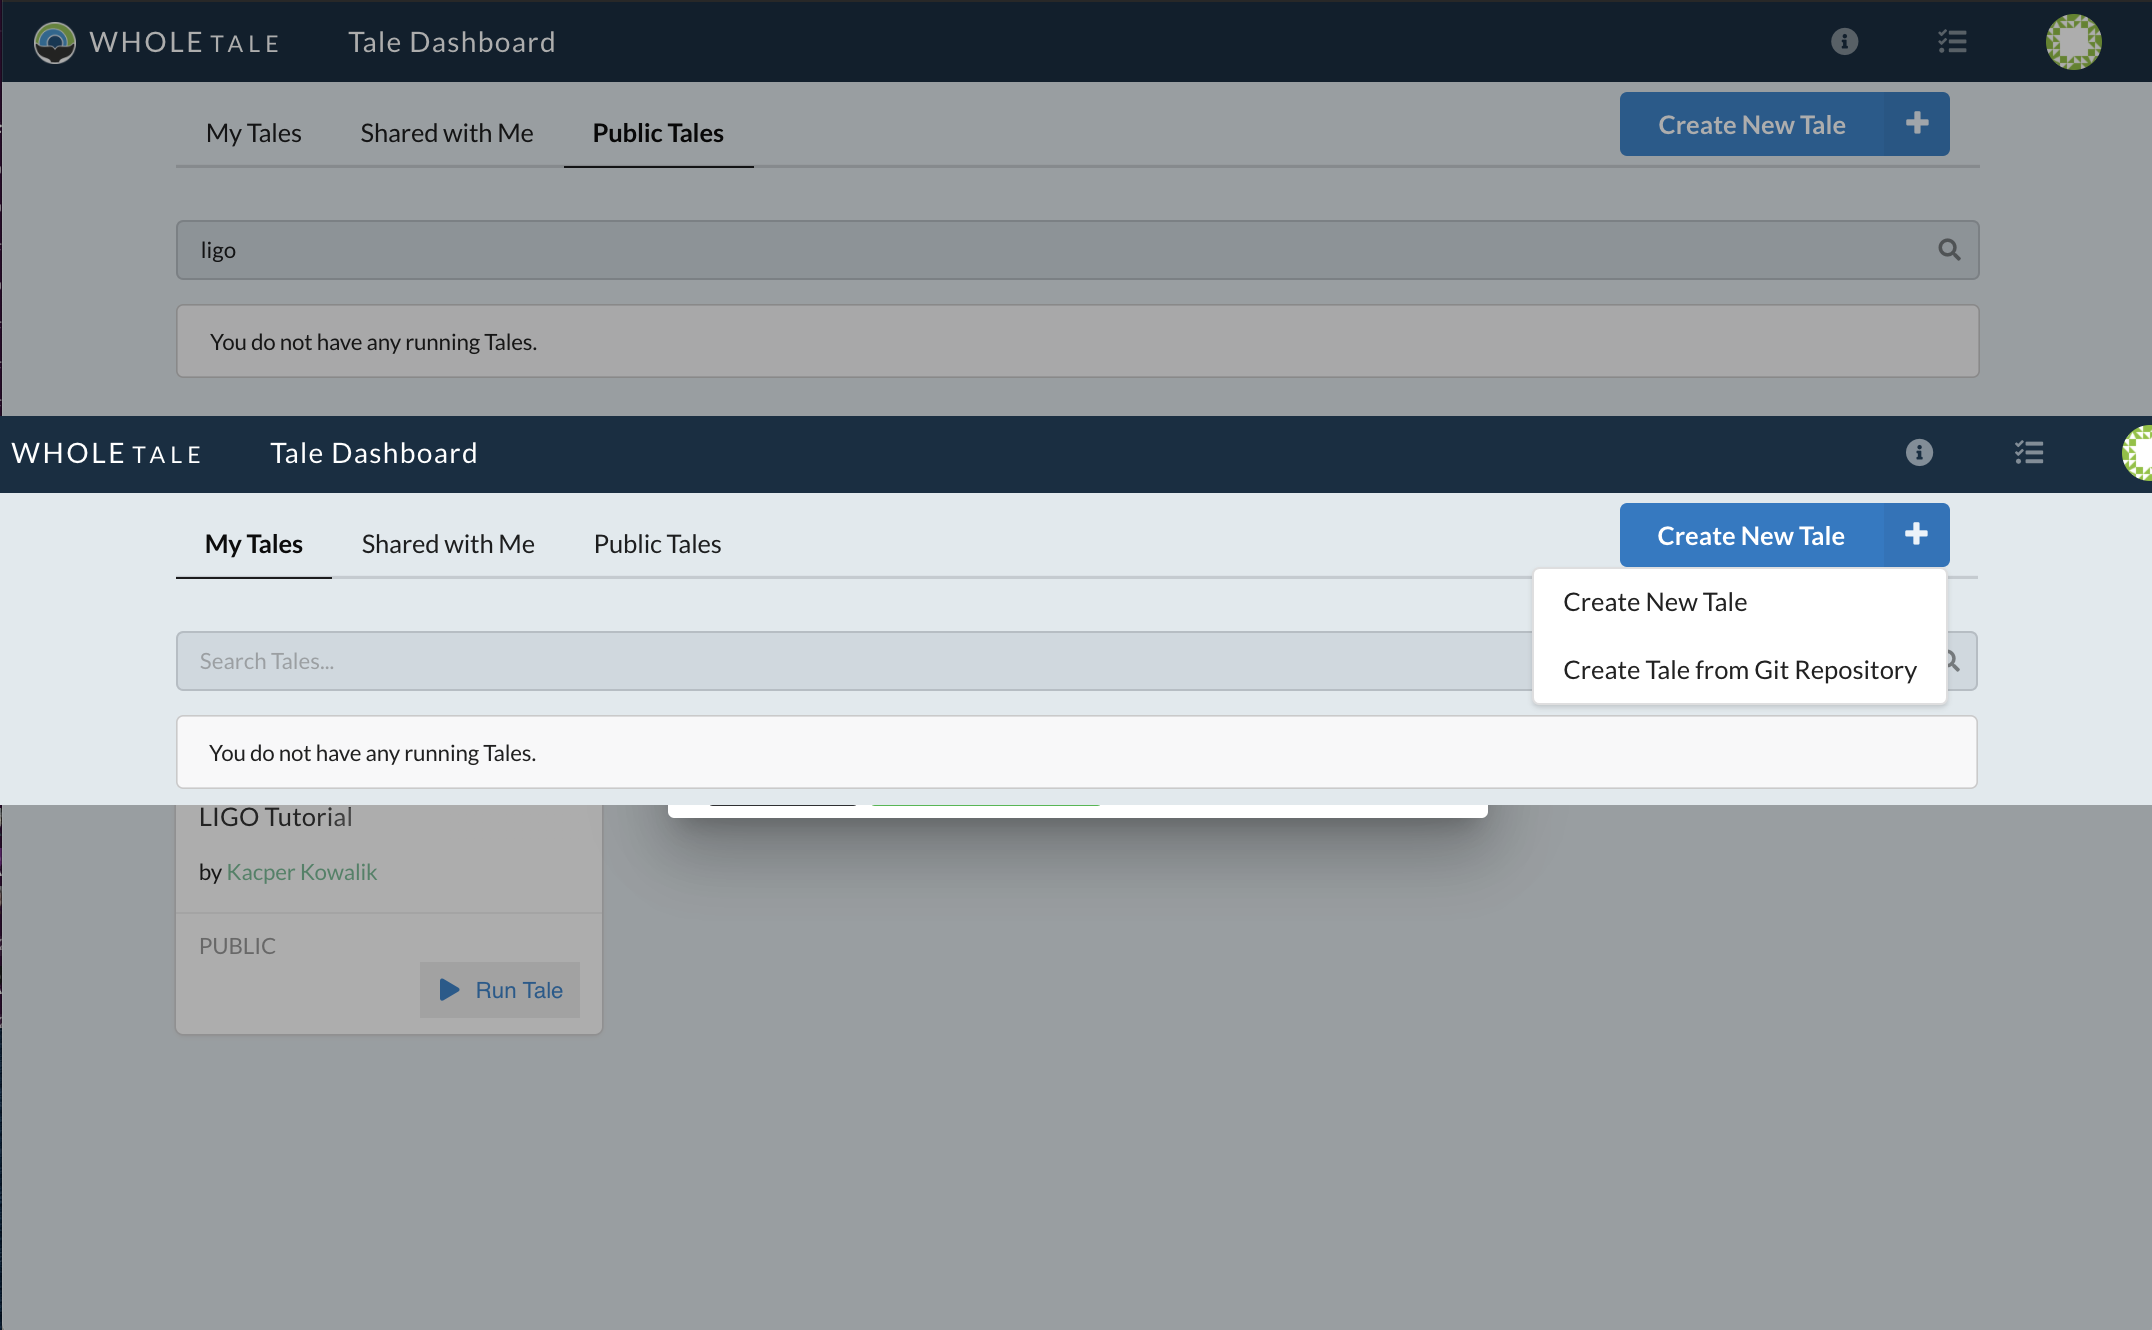
Select Create New from the Browse page to open the dialog for creating new Tales.
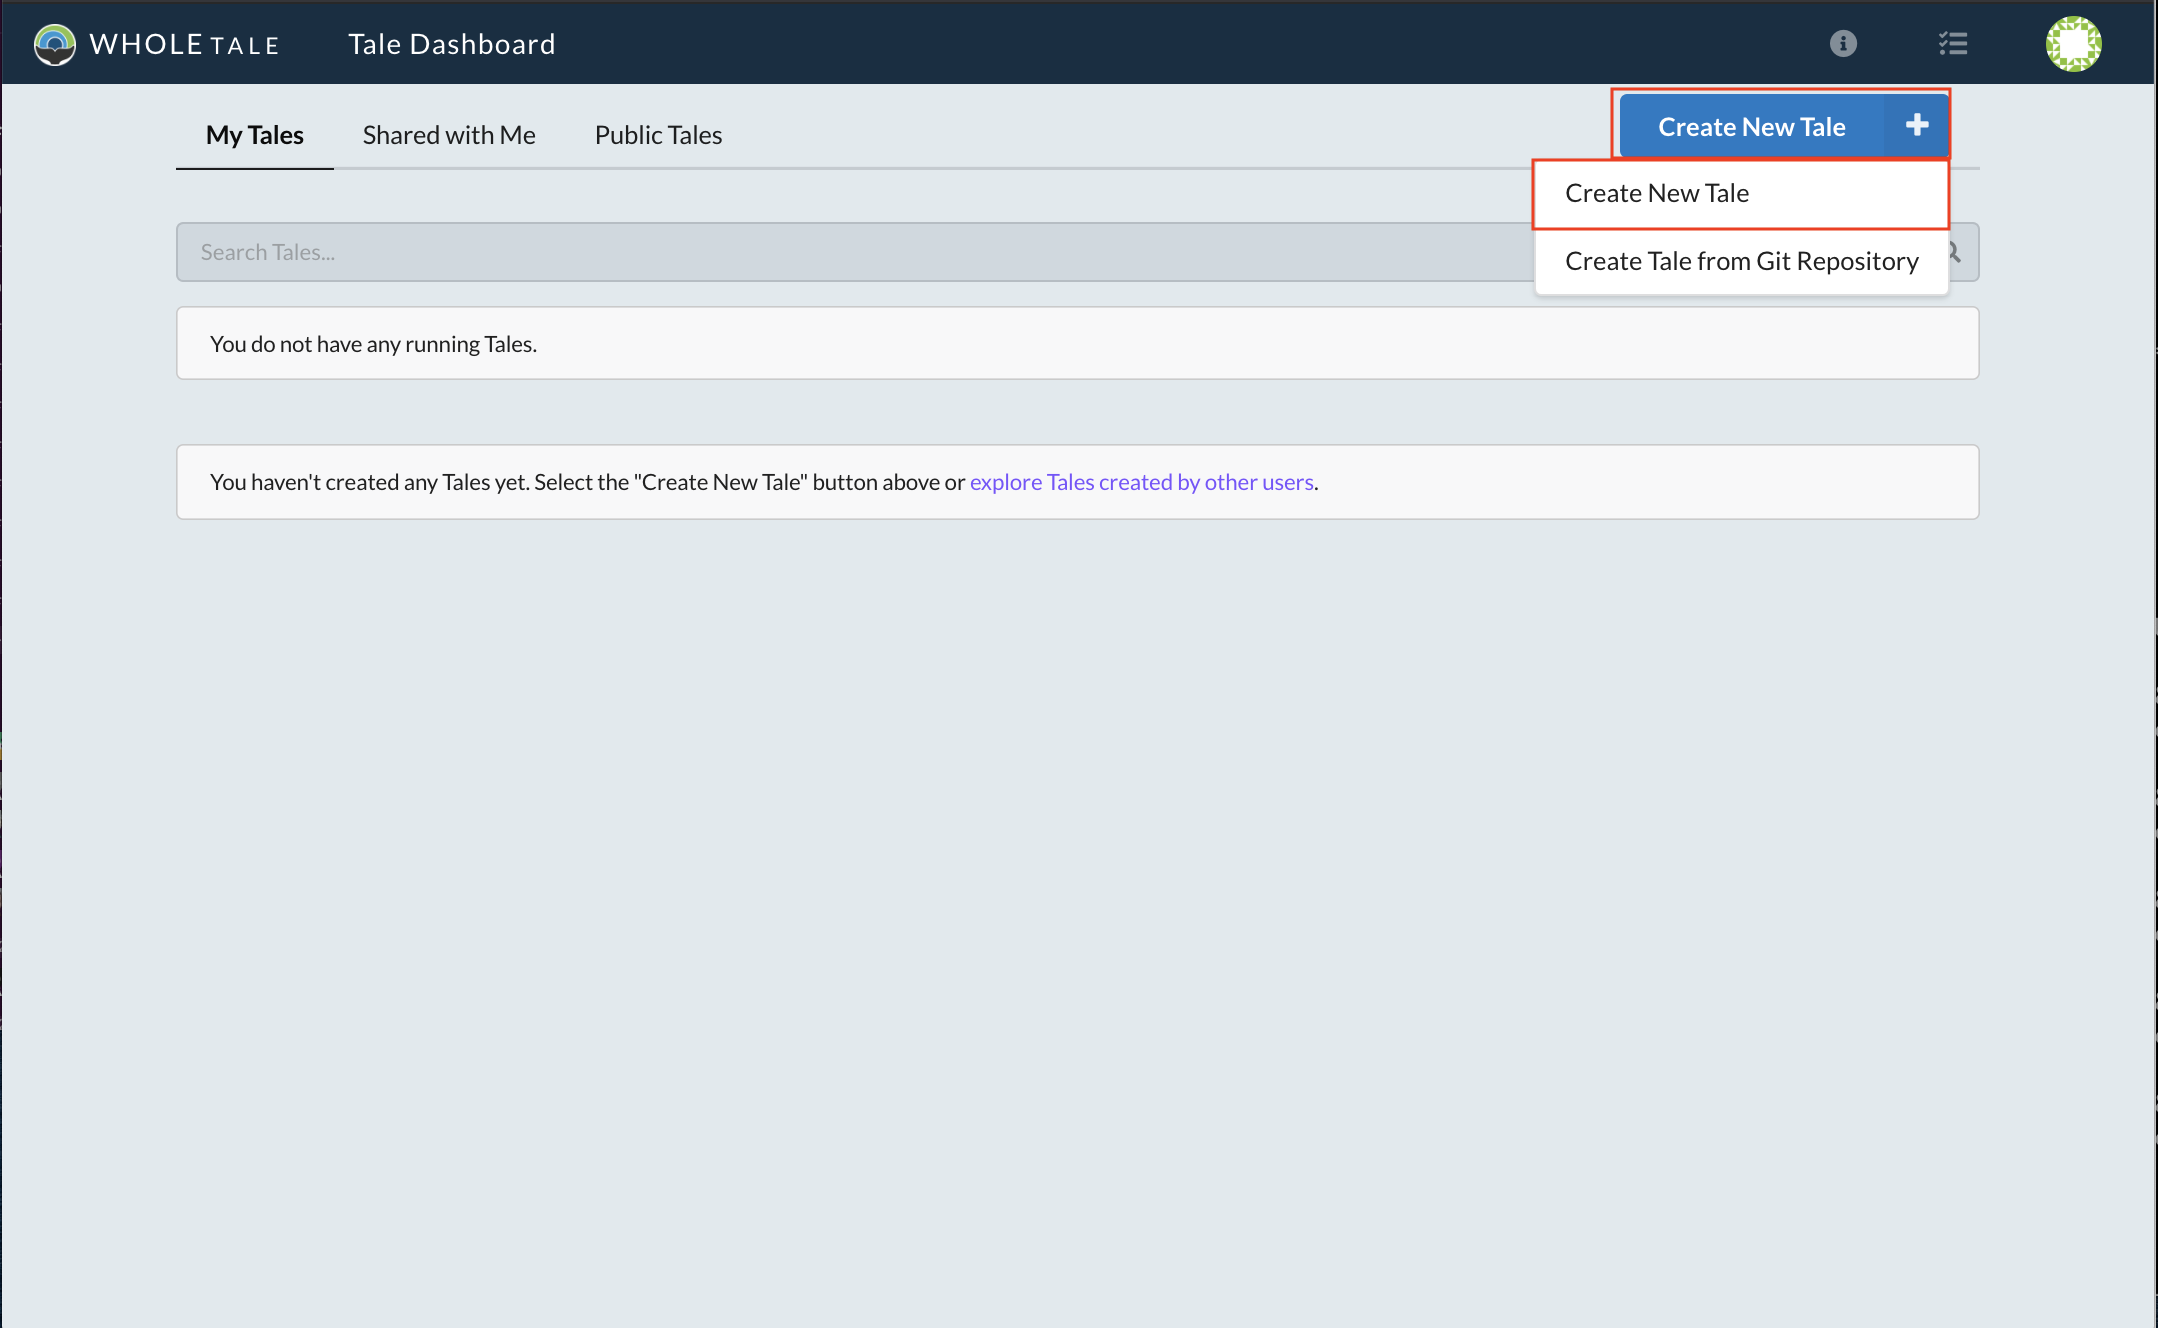
Location of the Create New Tale button
After the dialog opens, give the Tale a name. In this example we name it Quickstart Example. Select “JupyterLab” from the Compute Environment drop down and click Create New Tale to create the tale.
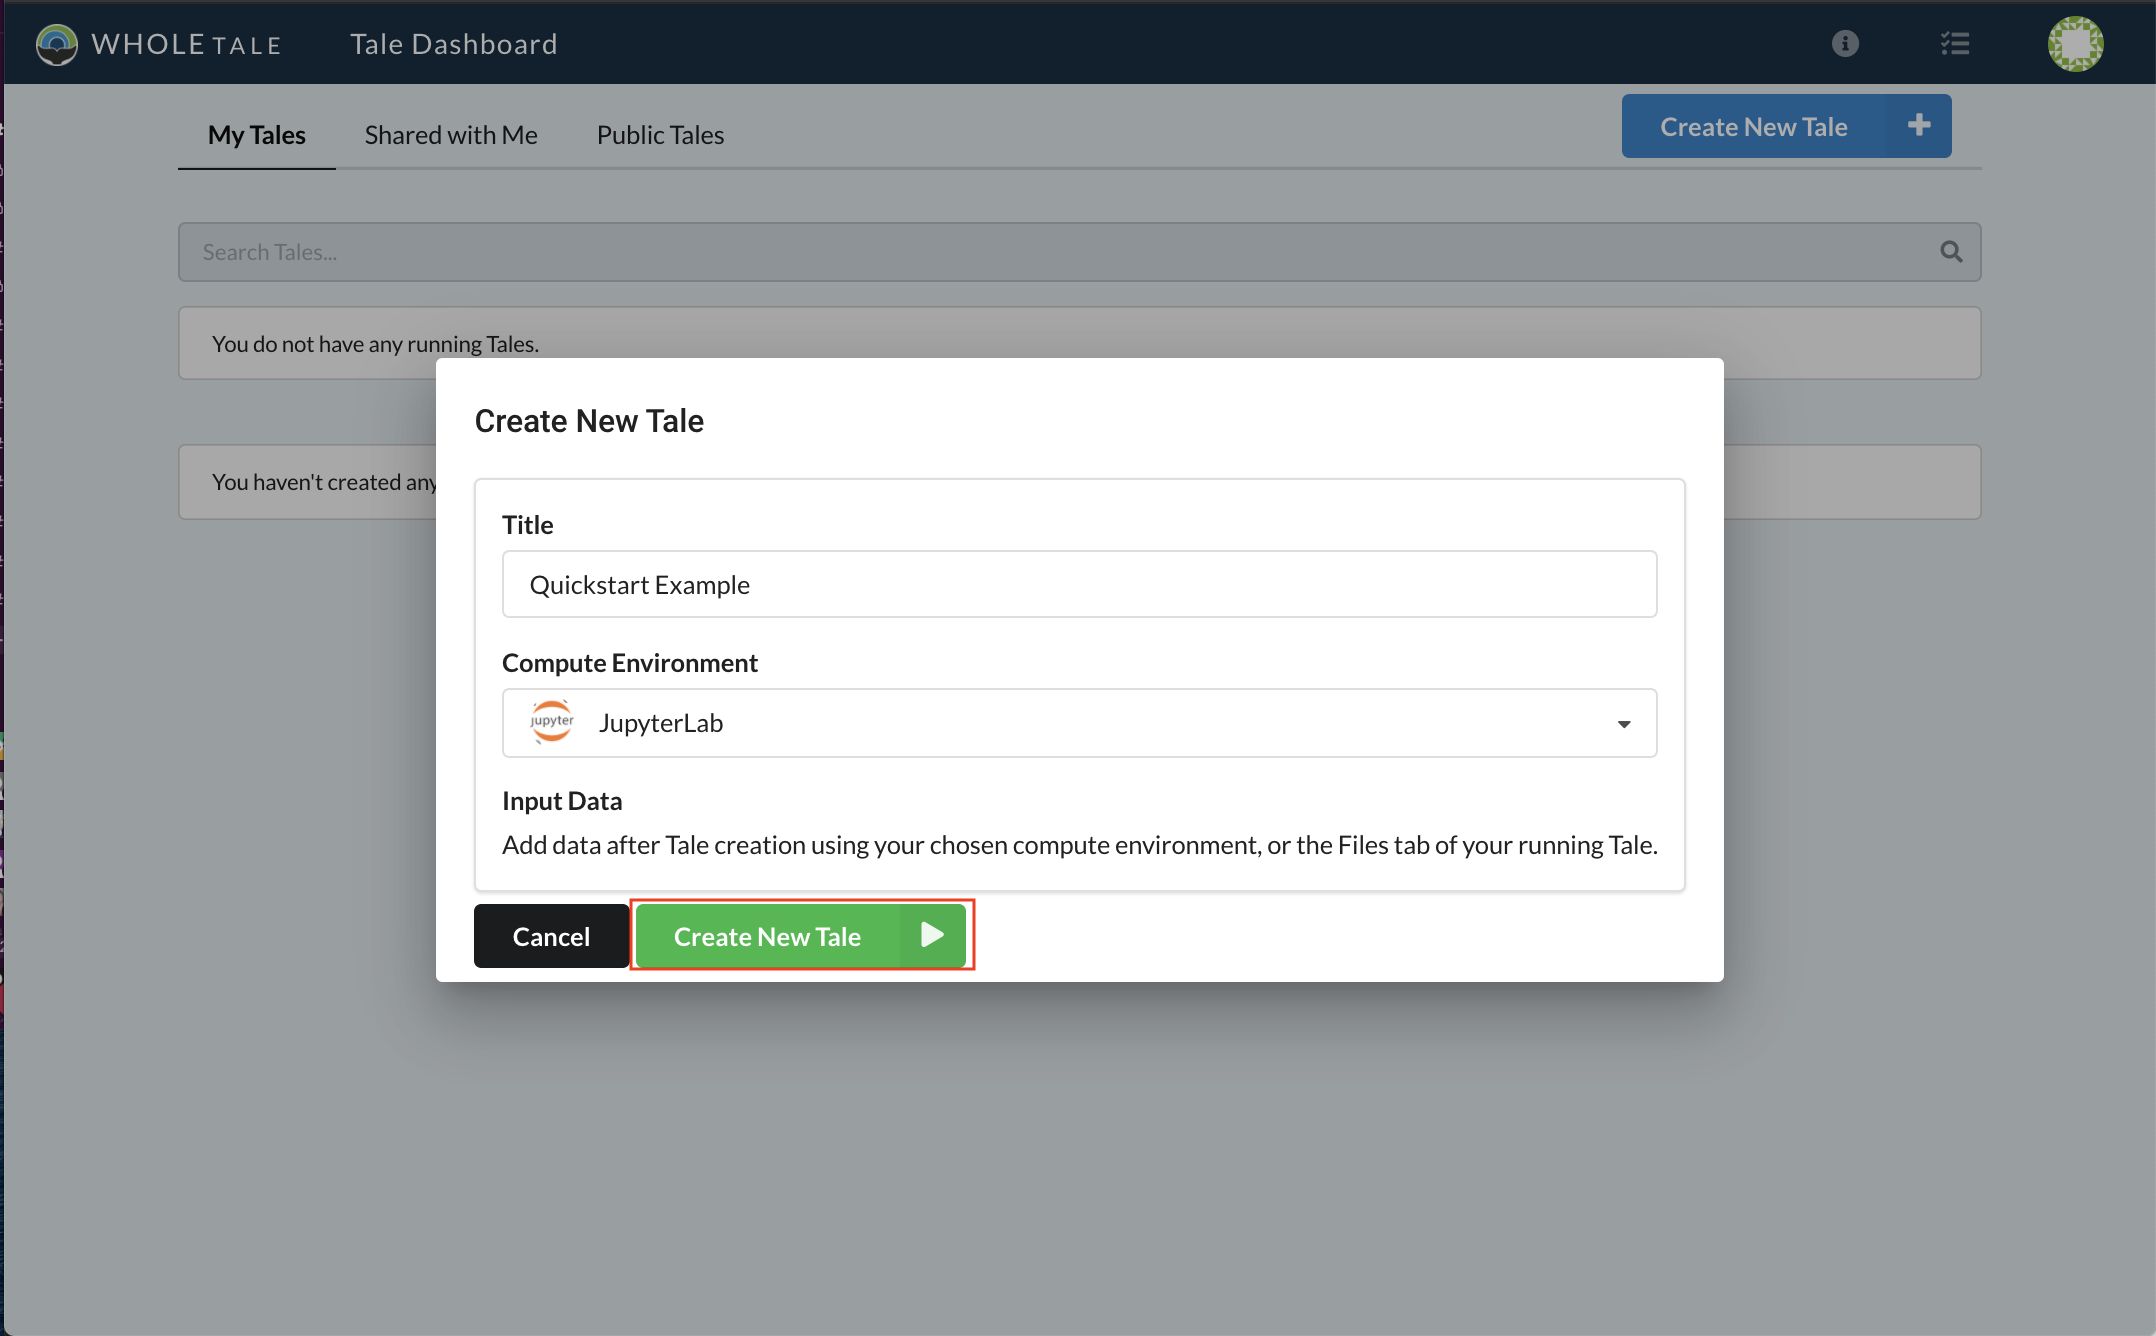
Creating a new Tale
To register a dataset from a research data repository, select the Files* tab, then **External Data, then the blue + sign. From the dropdown menu select Web (DOI or URL).
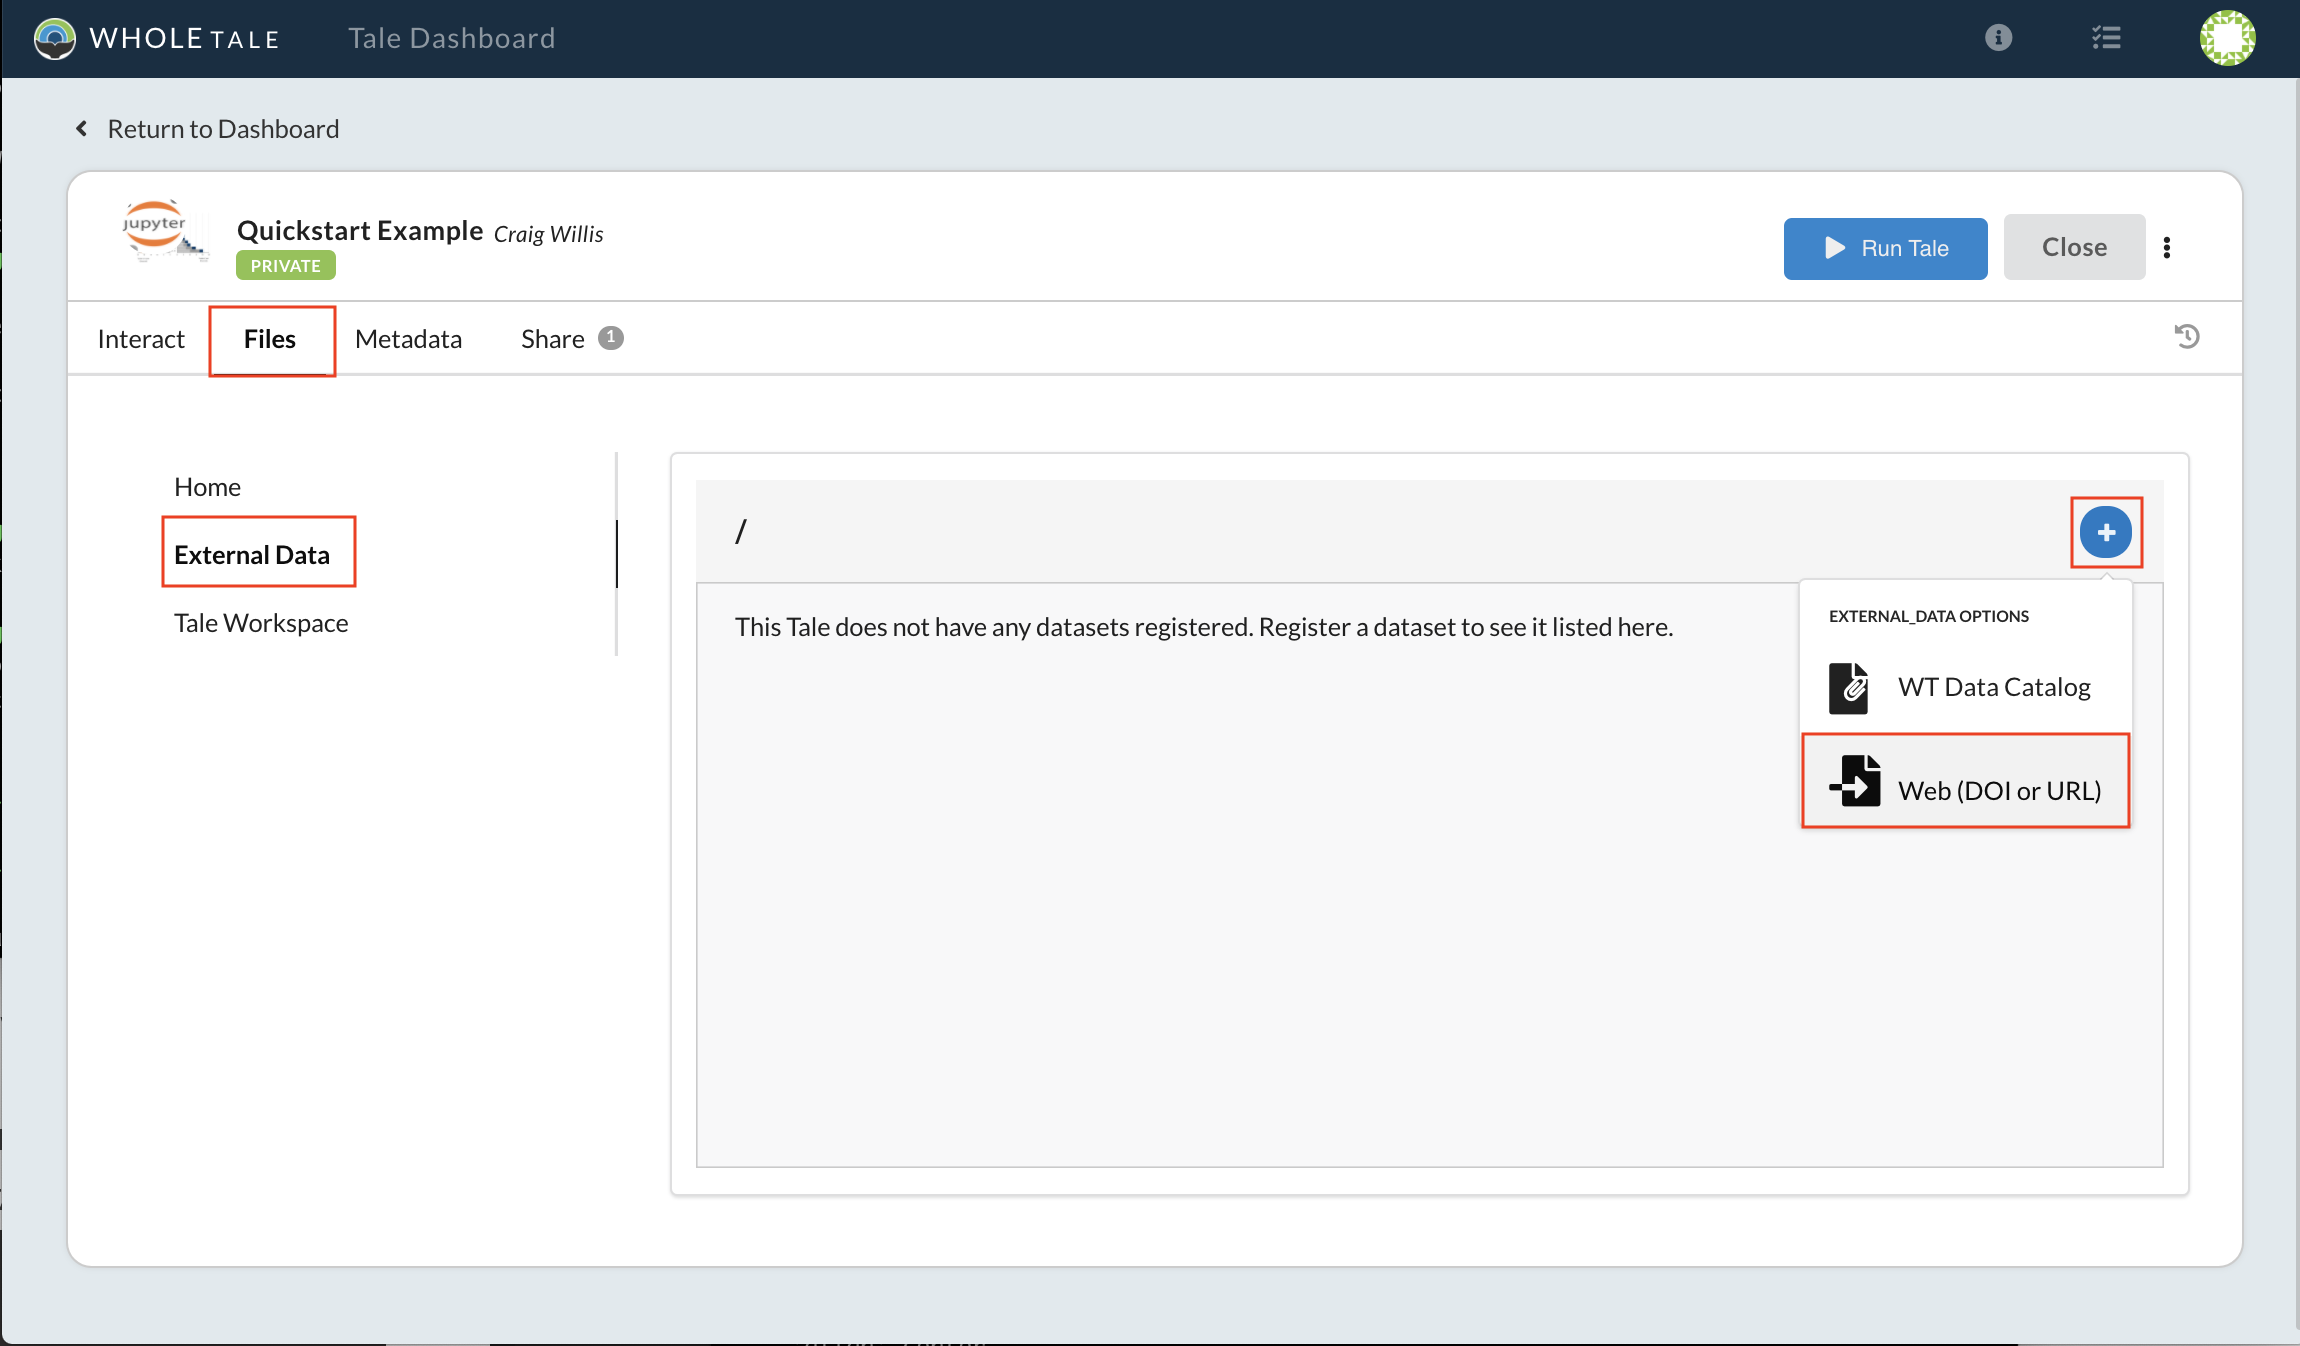
Register and external dataset by DOI
Enter the Digital Object Identifier (DOI) 10.5065/D6862DM8 for the Humans and Hydrology at High Latitudes: Water Use Information dataset published in DataONE. Select Search and then Register.
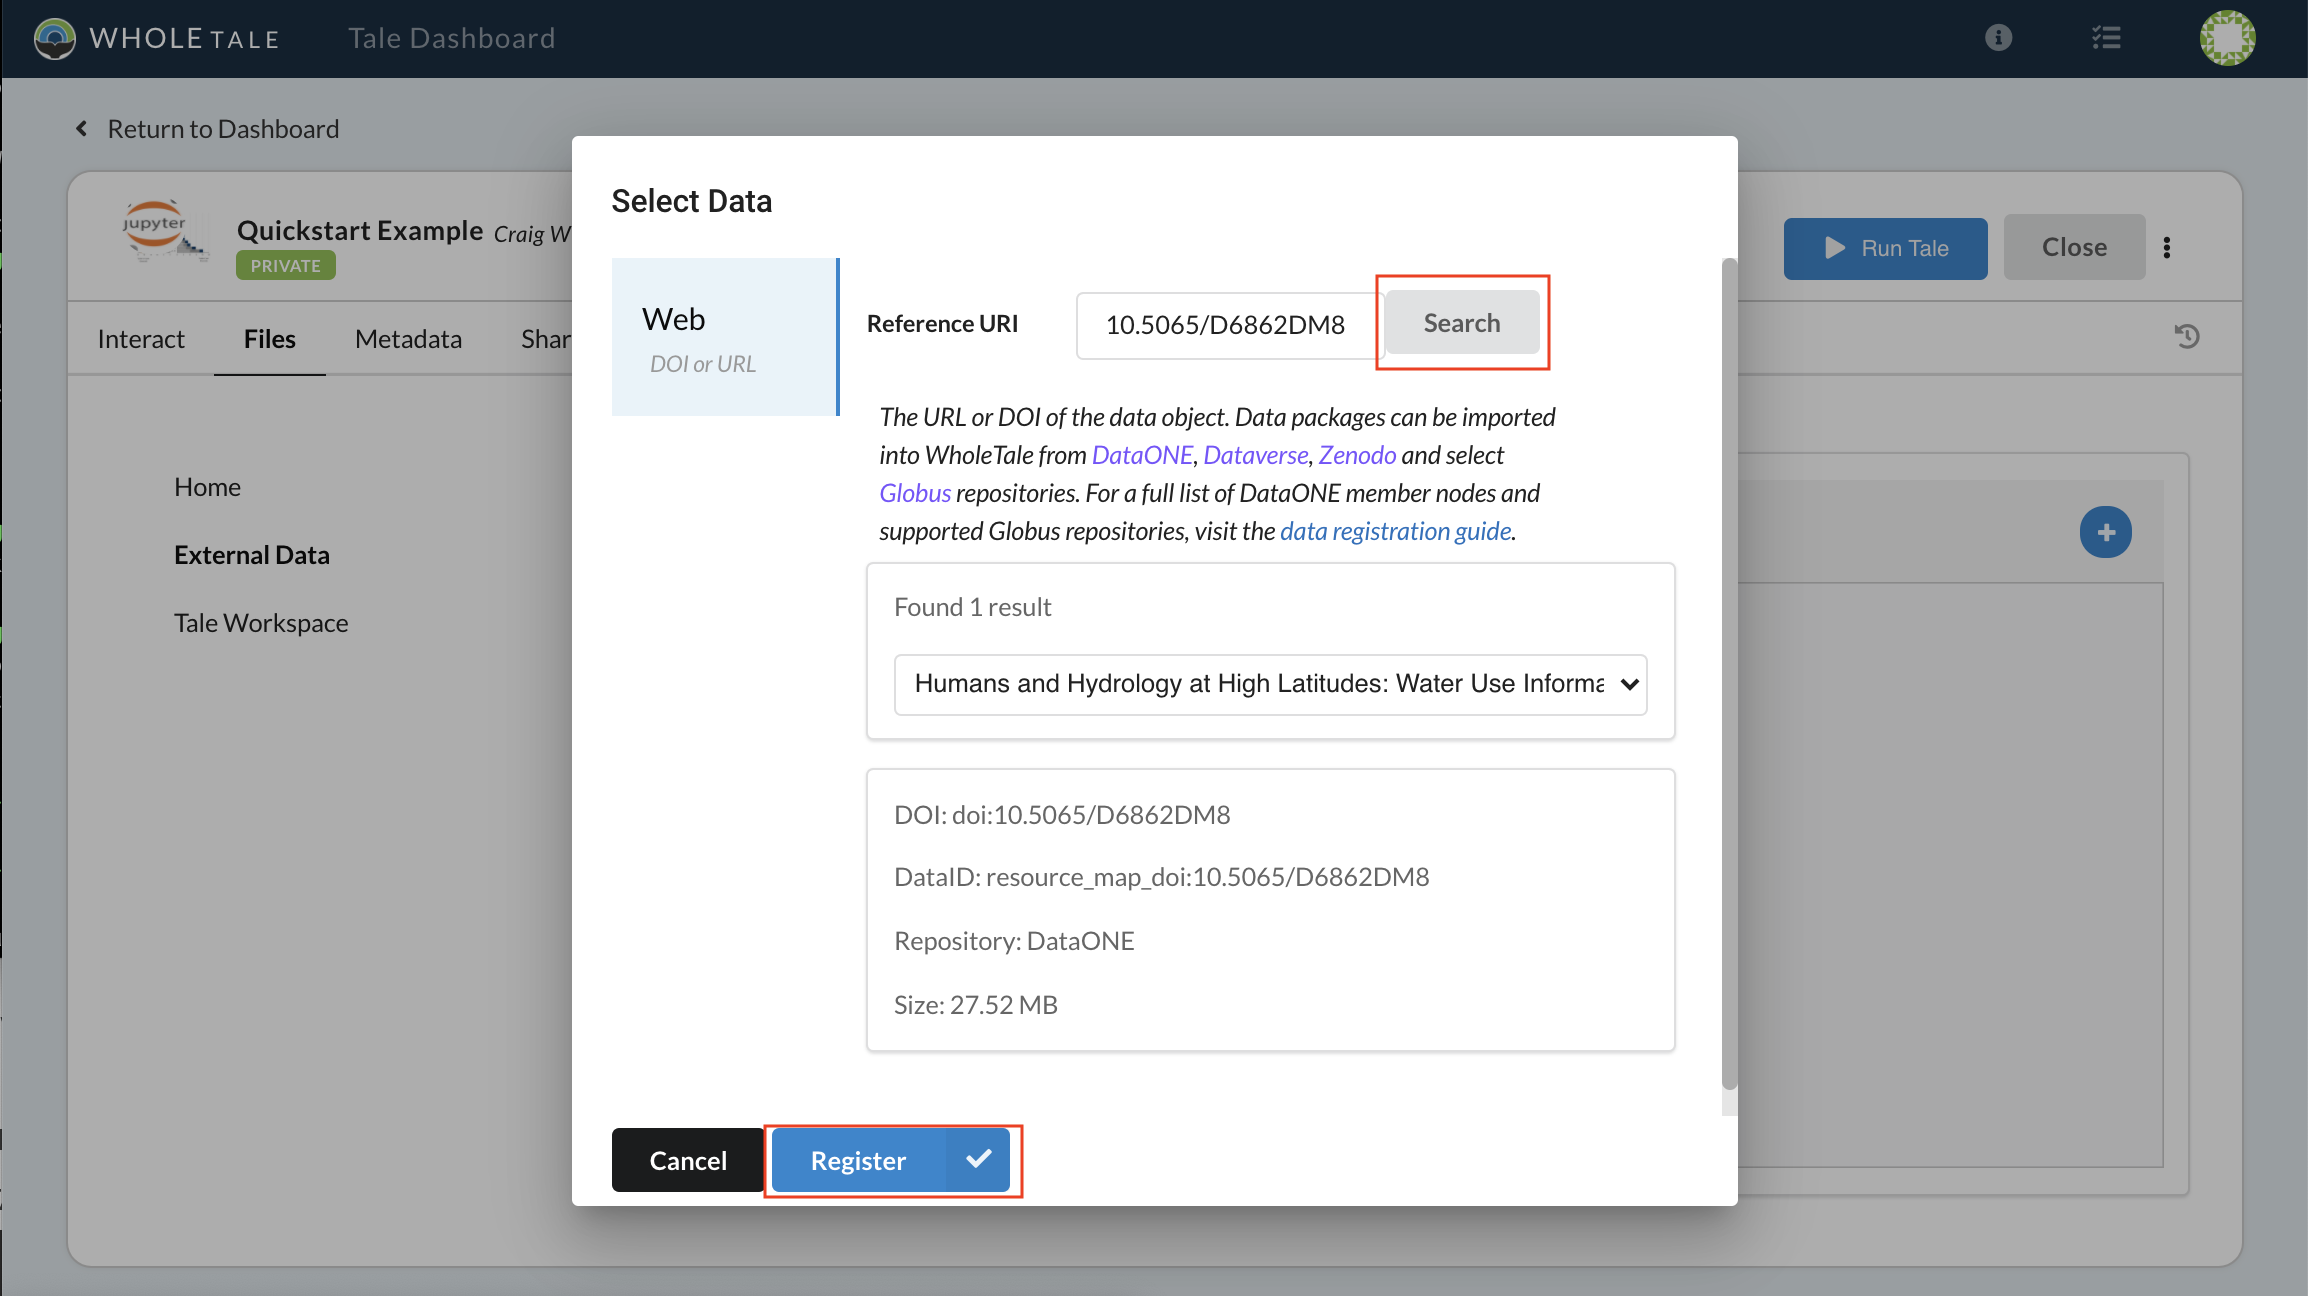
Registering a DataONE dataset by DOI
A notification window will appear indicating the status of the registration process.
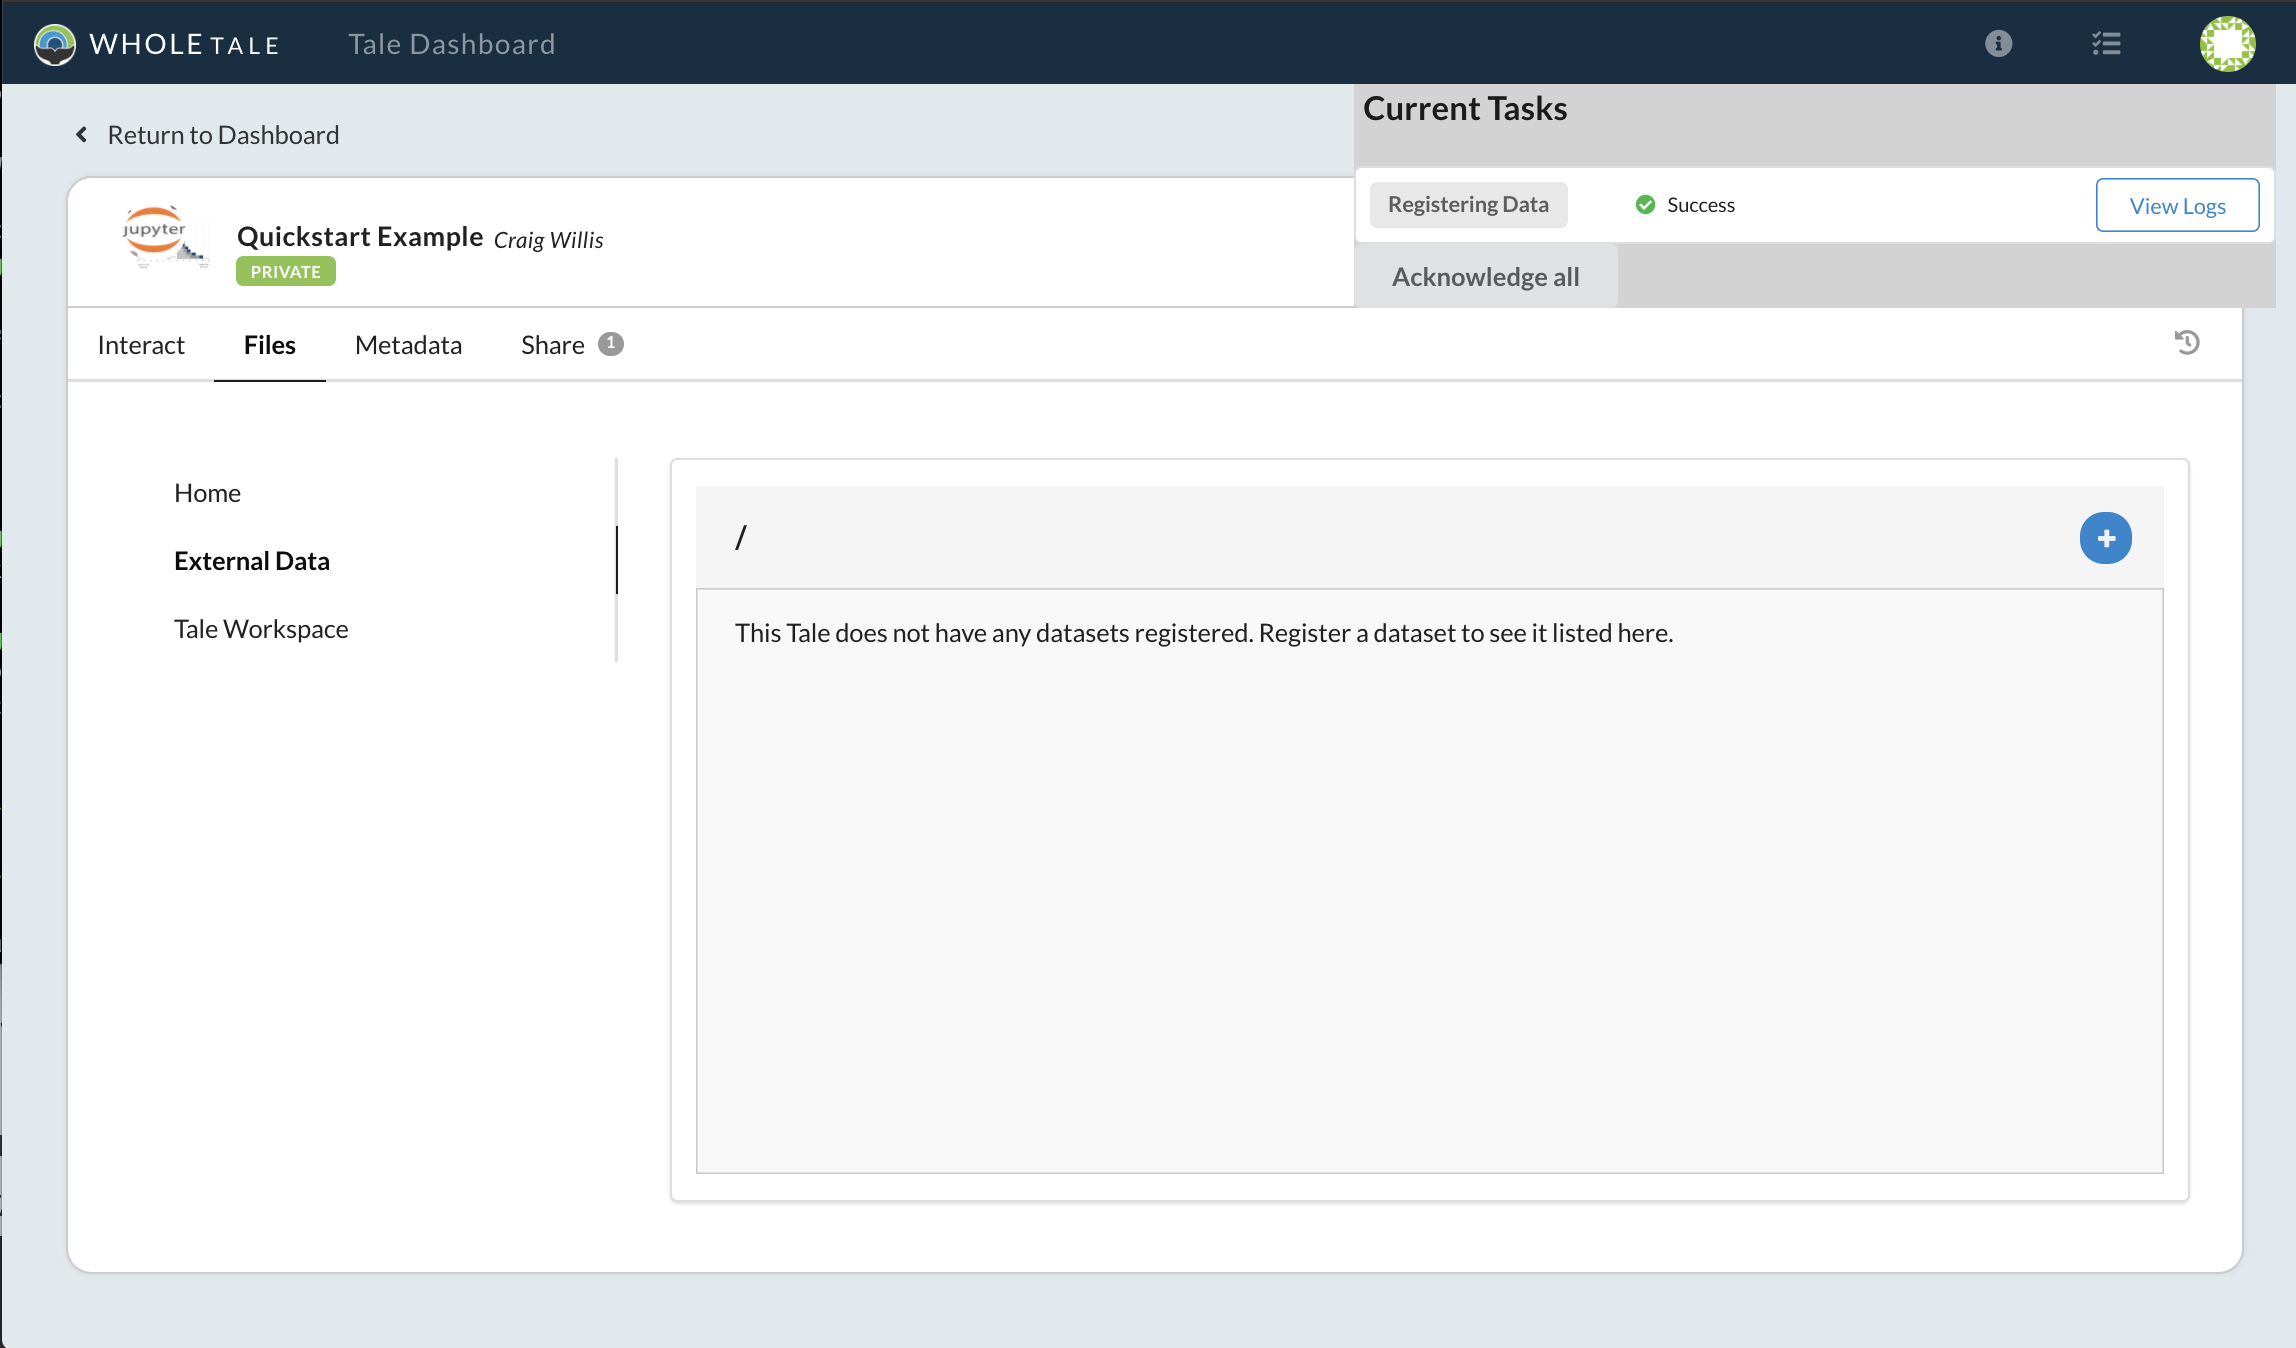
Dataset registration progress and status
To add one or more files from the registered dataset to your Tale, again select Files > External Data then the blue + icon. From the dropdown menu select the WT Data Catalog:
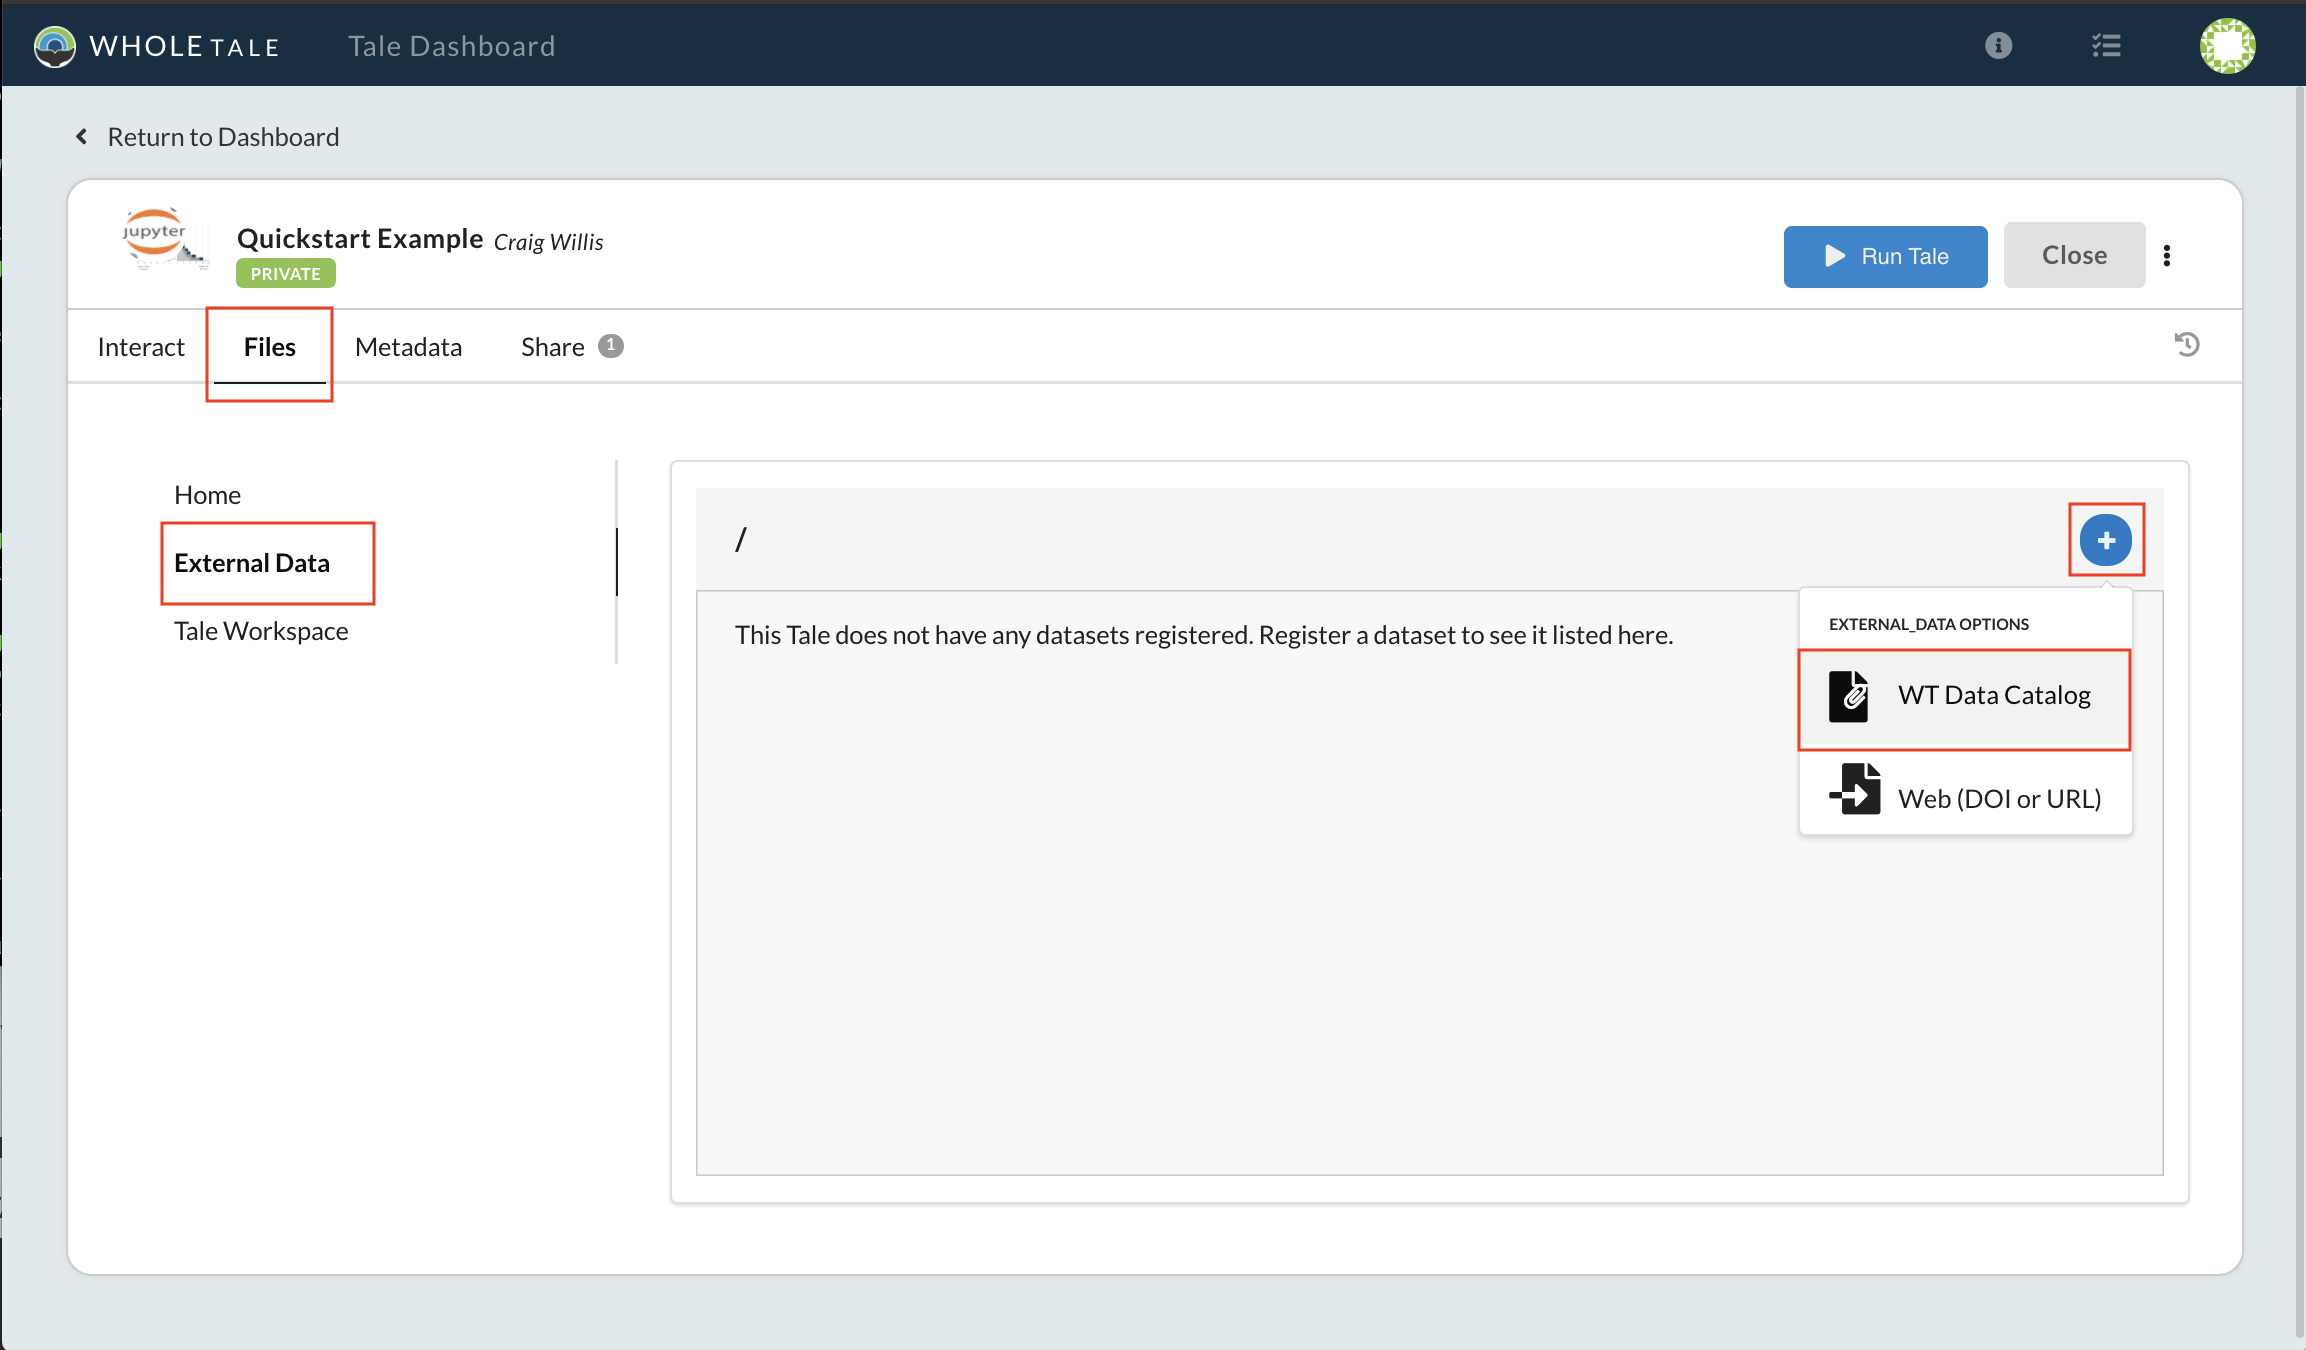
Browse to the WT Data Catalog
Use the Select Data window to browse the dataset. Highlight the file “usco2005.xls” and click Add Selected and finally click the Save button to save the changes to your Tale.
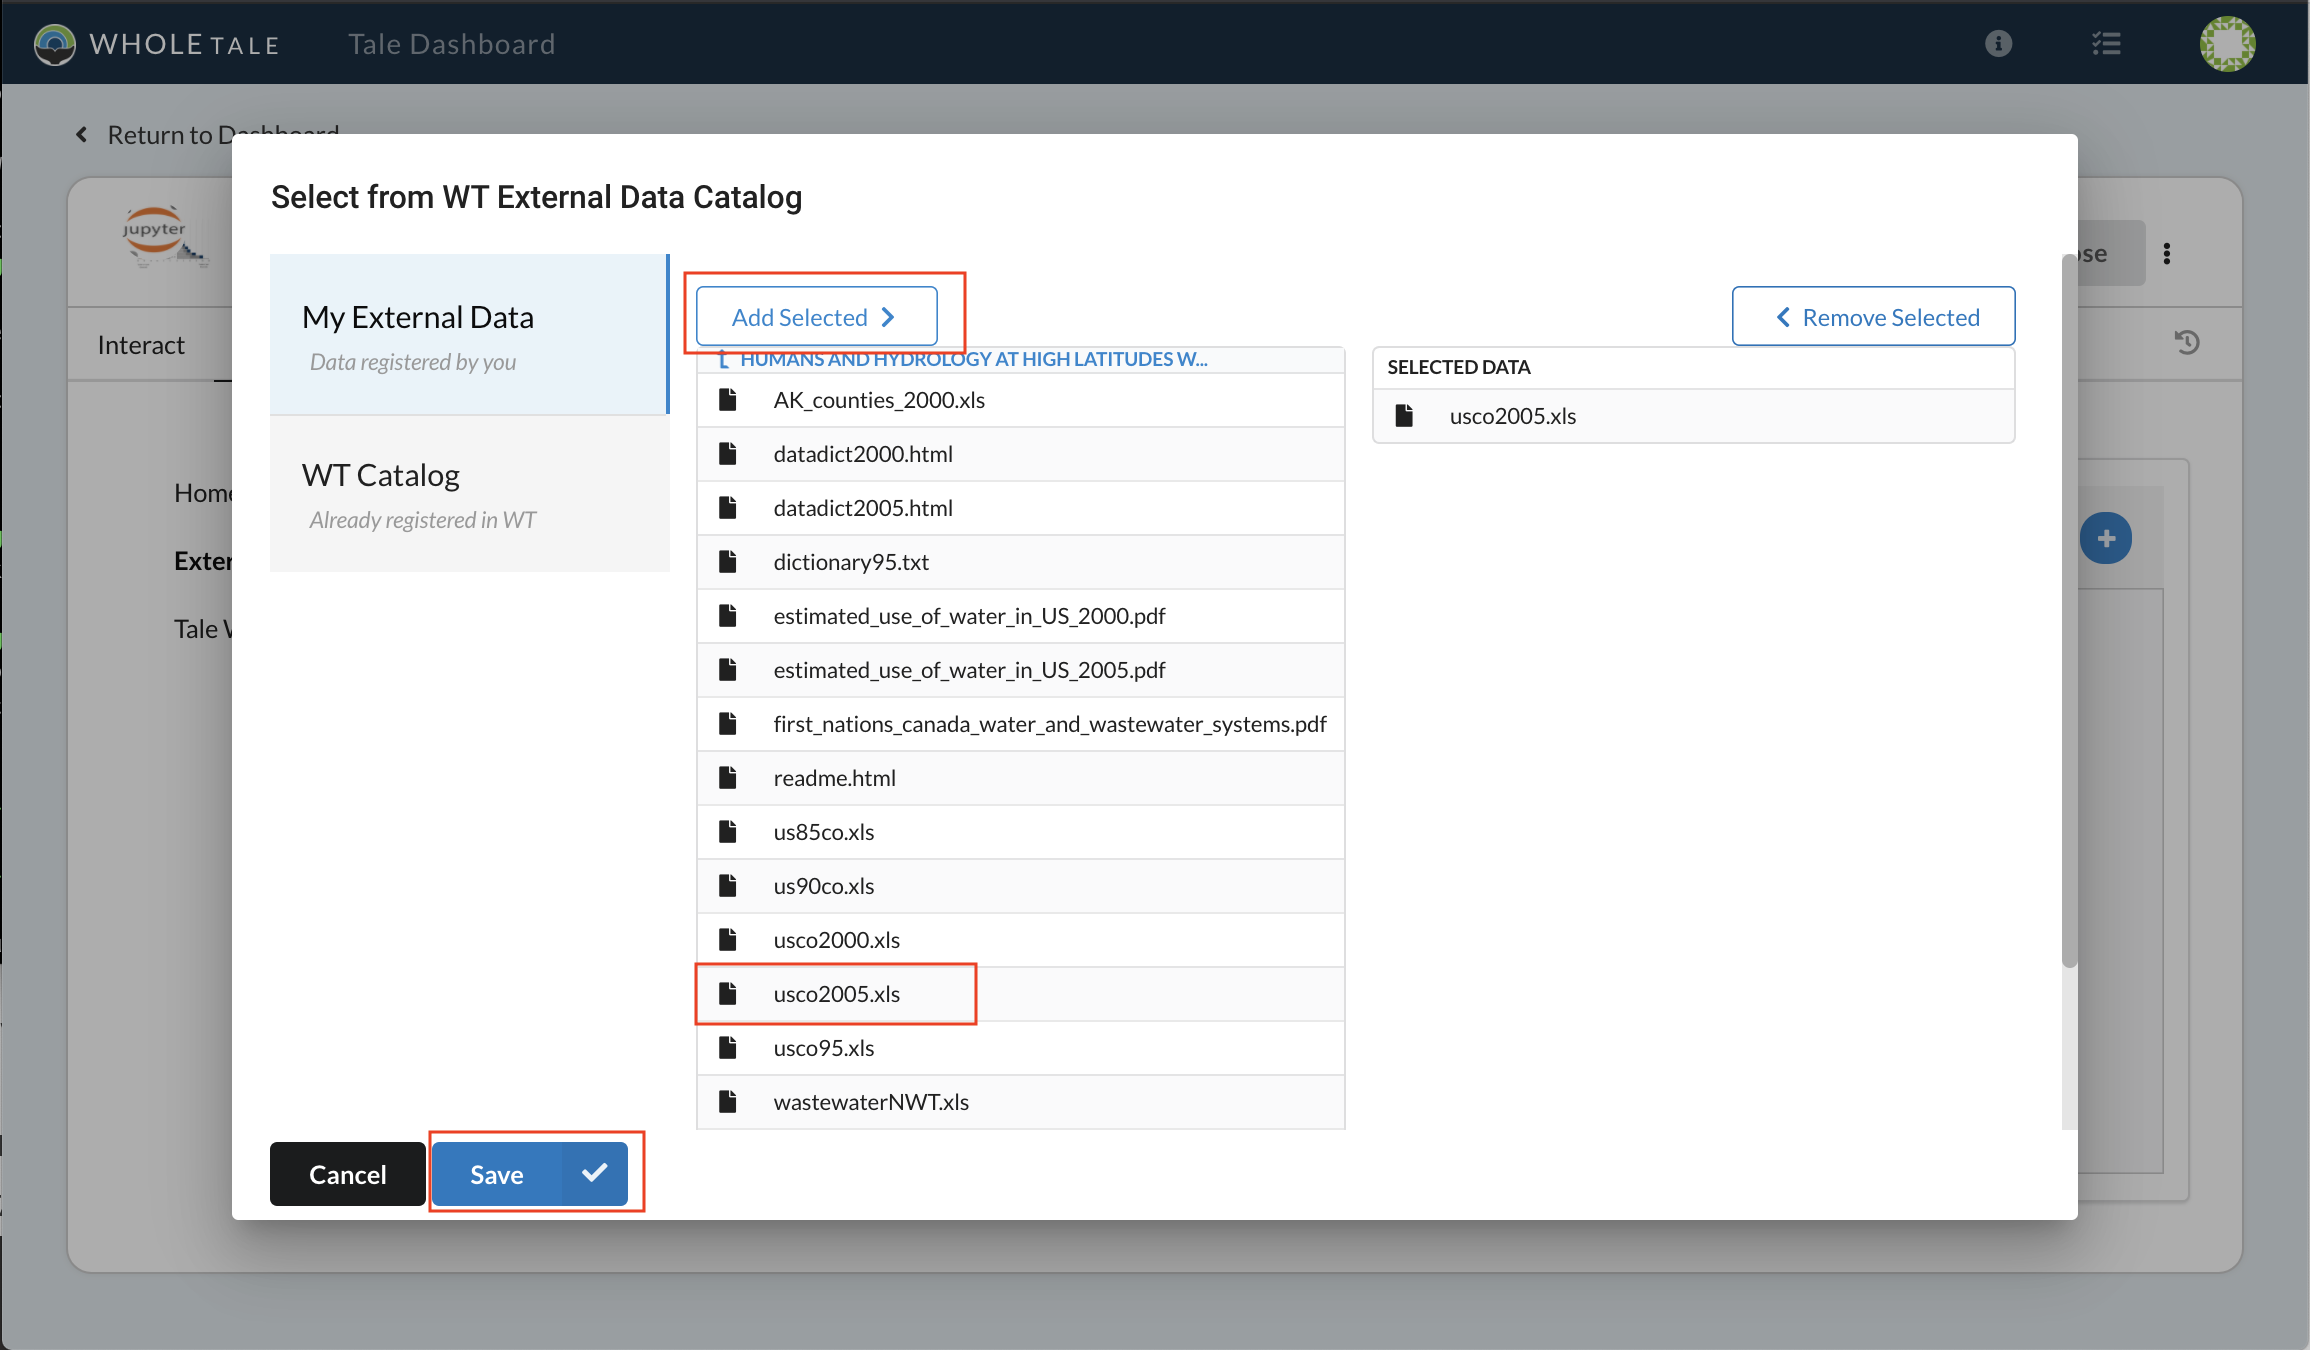
Select and add “usco2005.xls”
The selected file will appear in your External Data folder (and is accessible in the data directory when you start your JupyterLab environment).
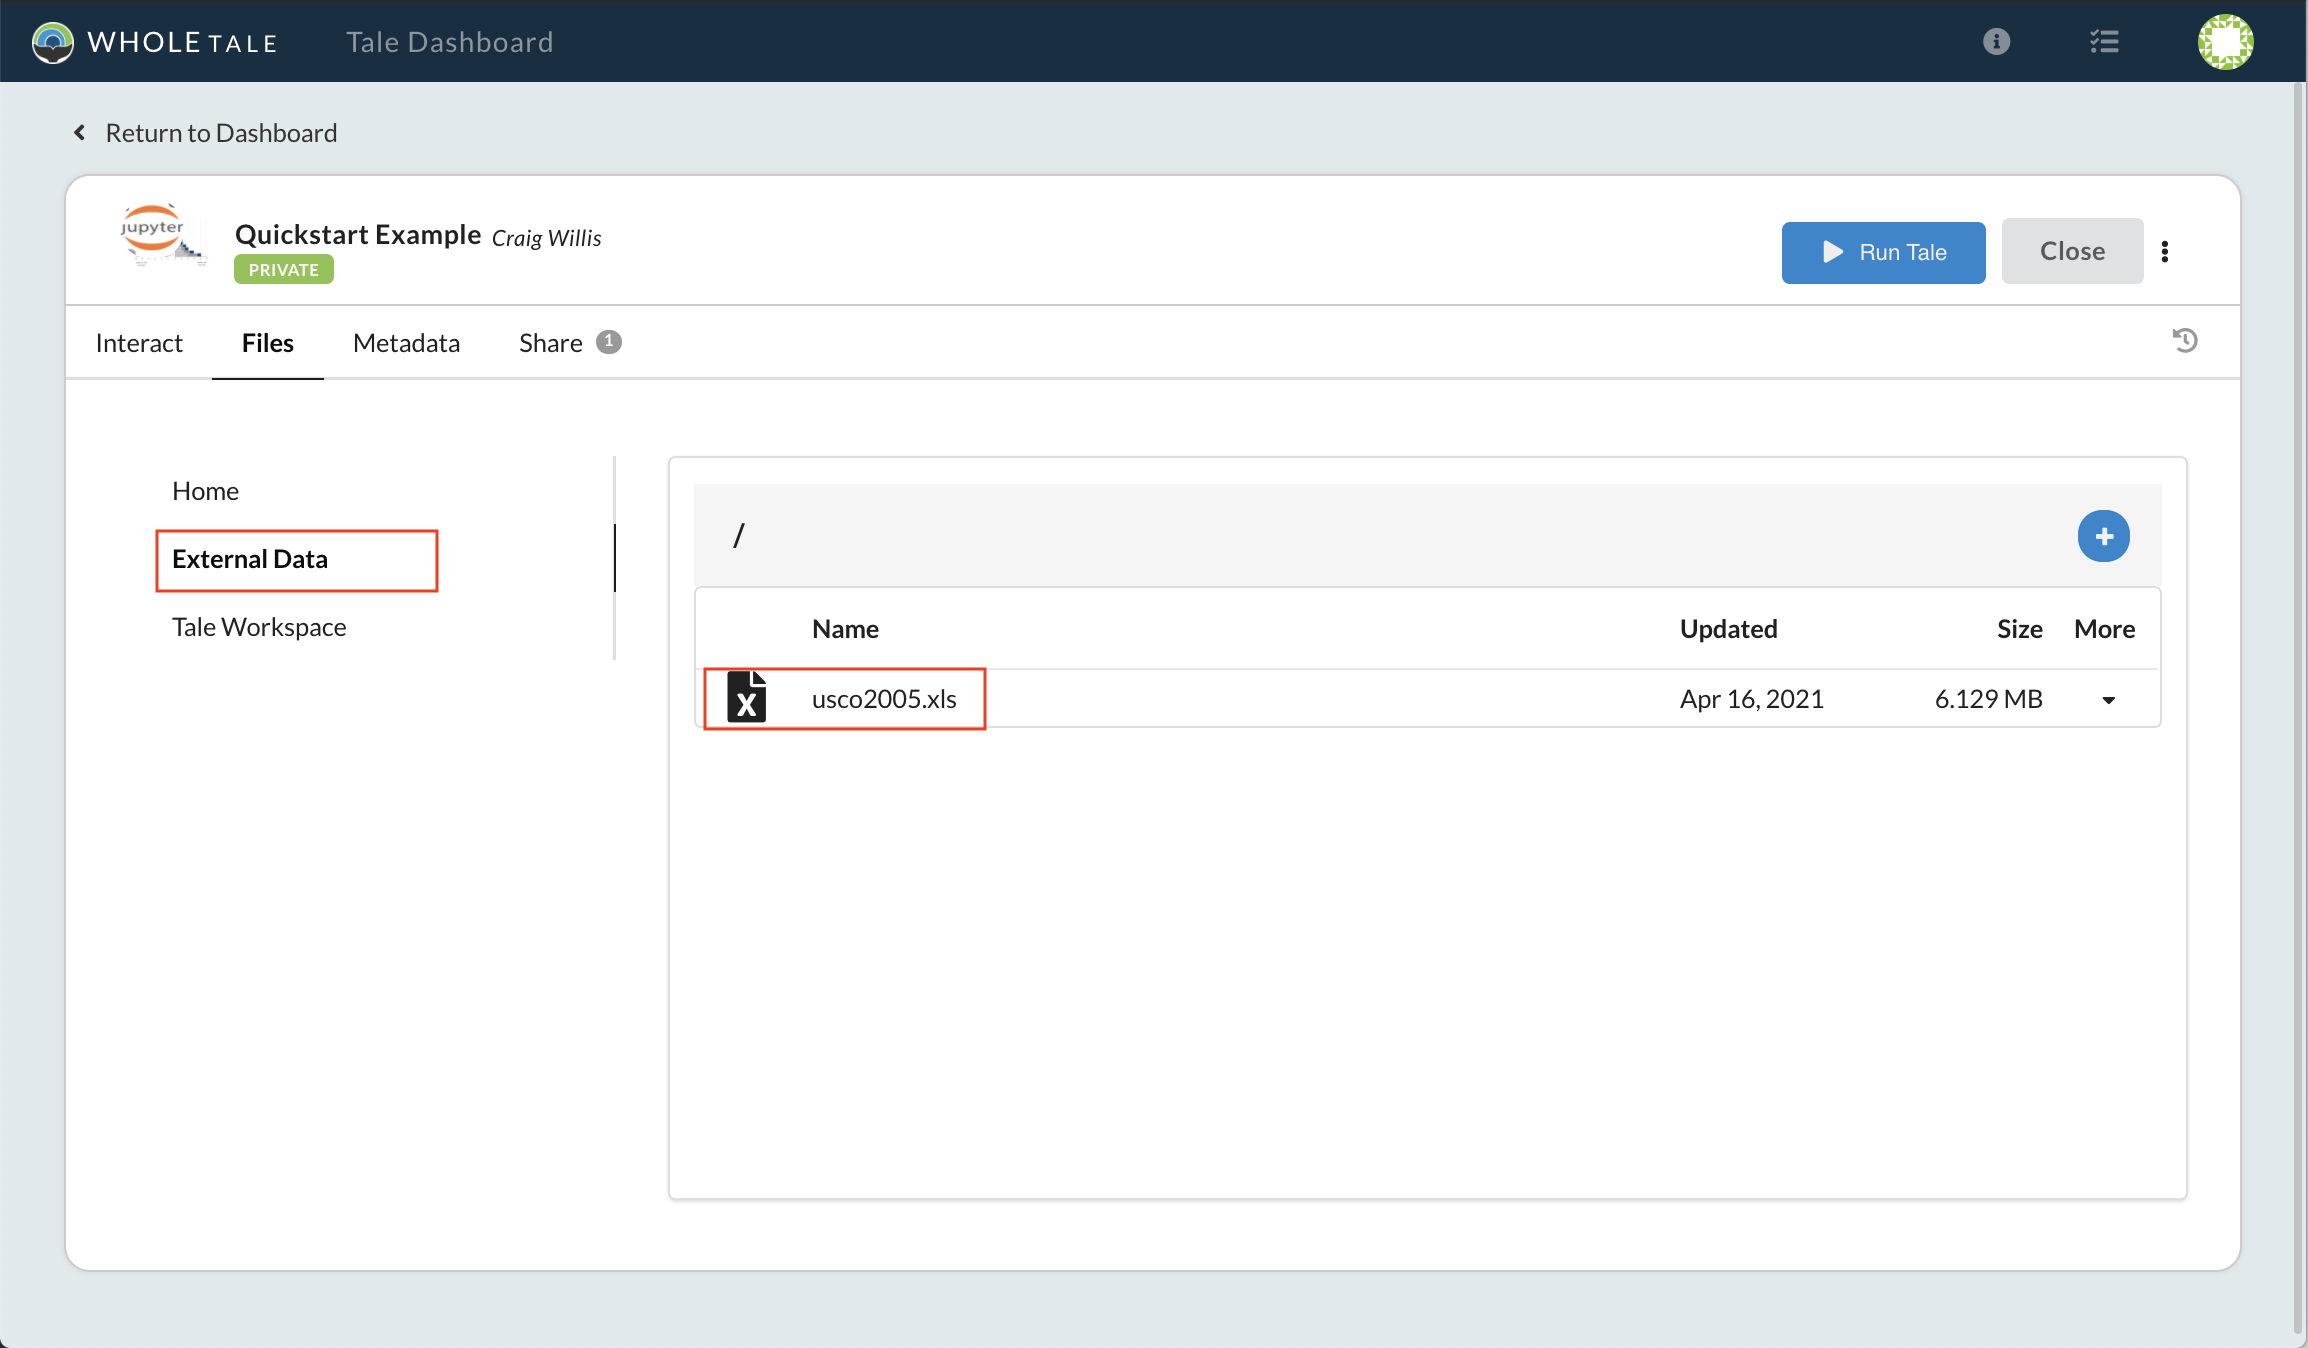
External Data folder with selected file
Download the
example files. Select the Tale Workspace folder on the left hand side. Select the “+” button and Upload File from the dropdown. Upload the postBuild, requirements.txt, and quickstart notebook.
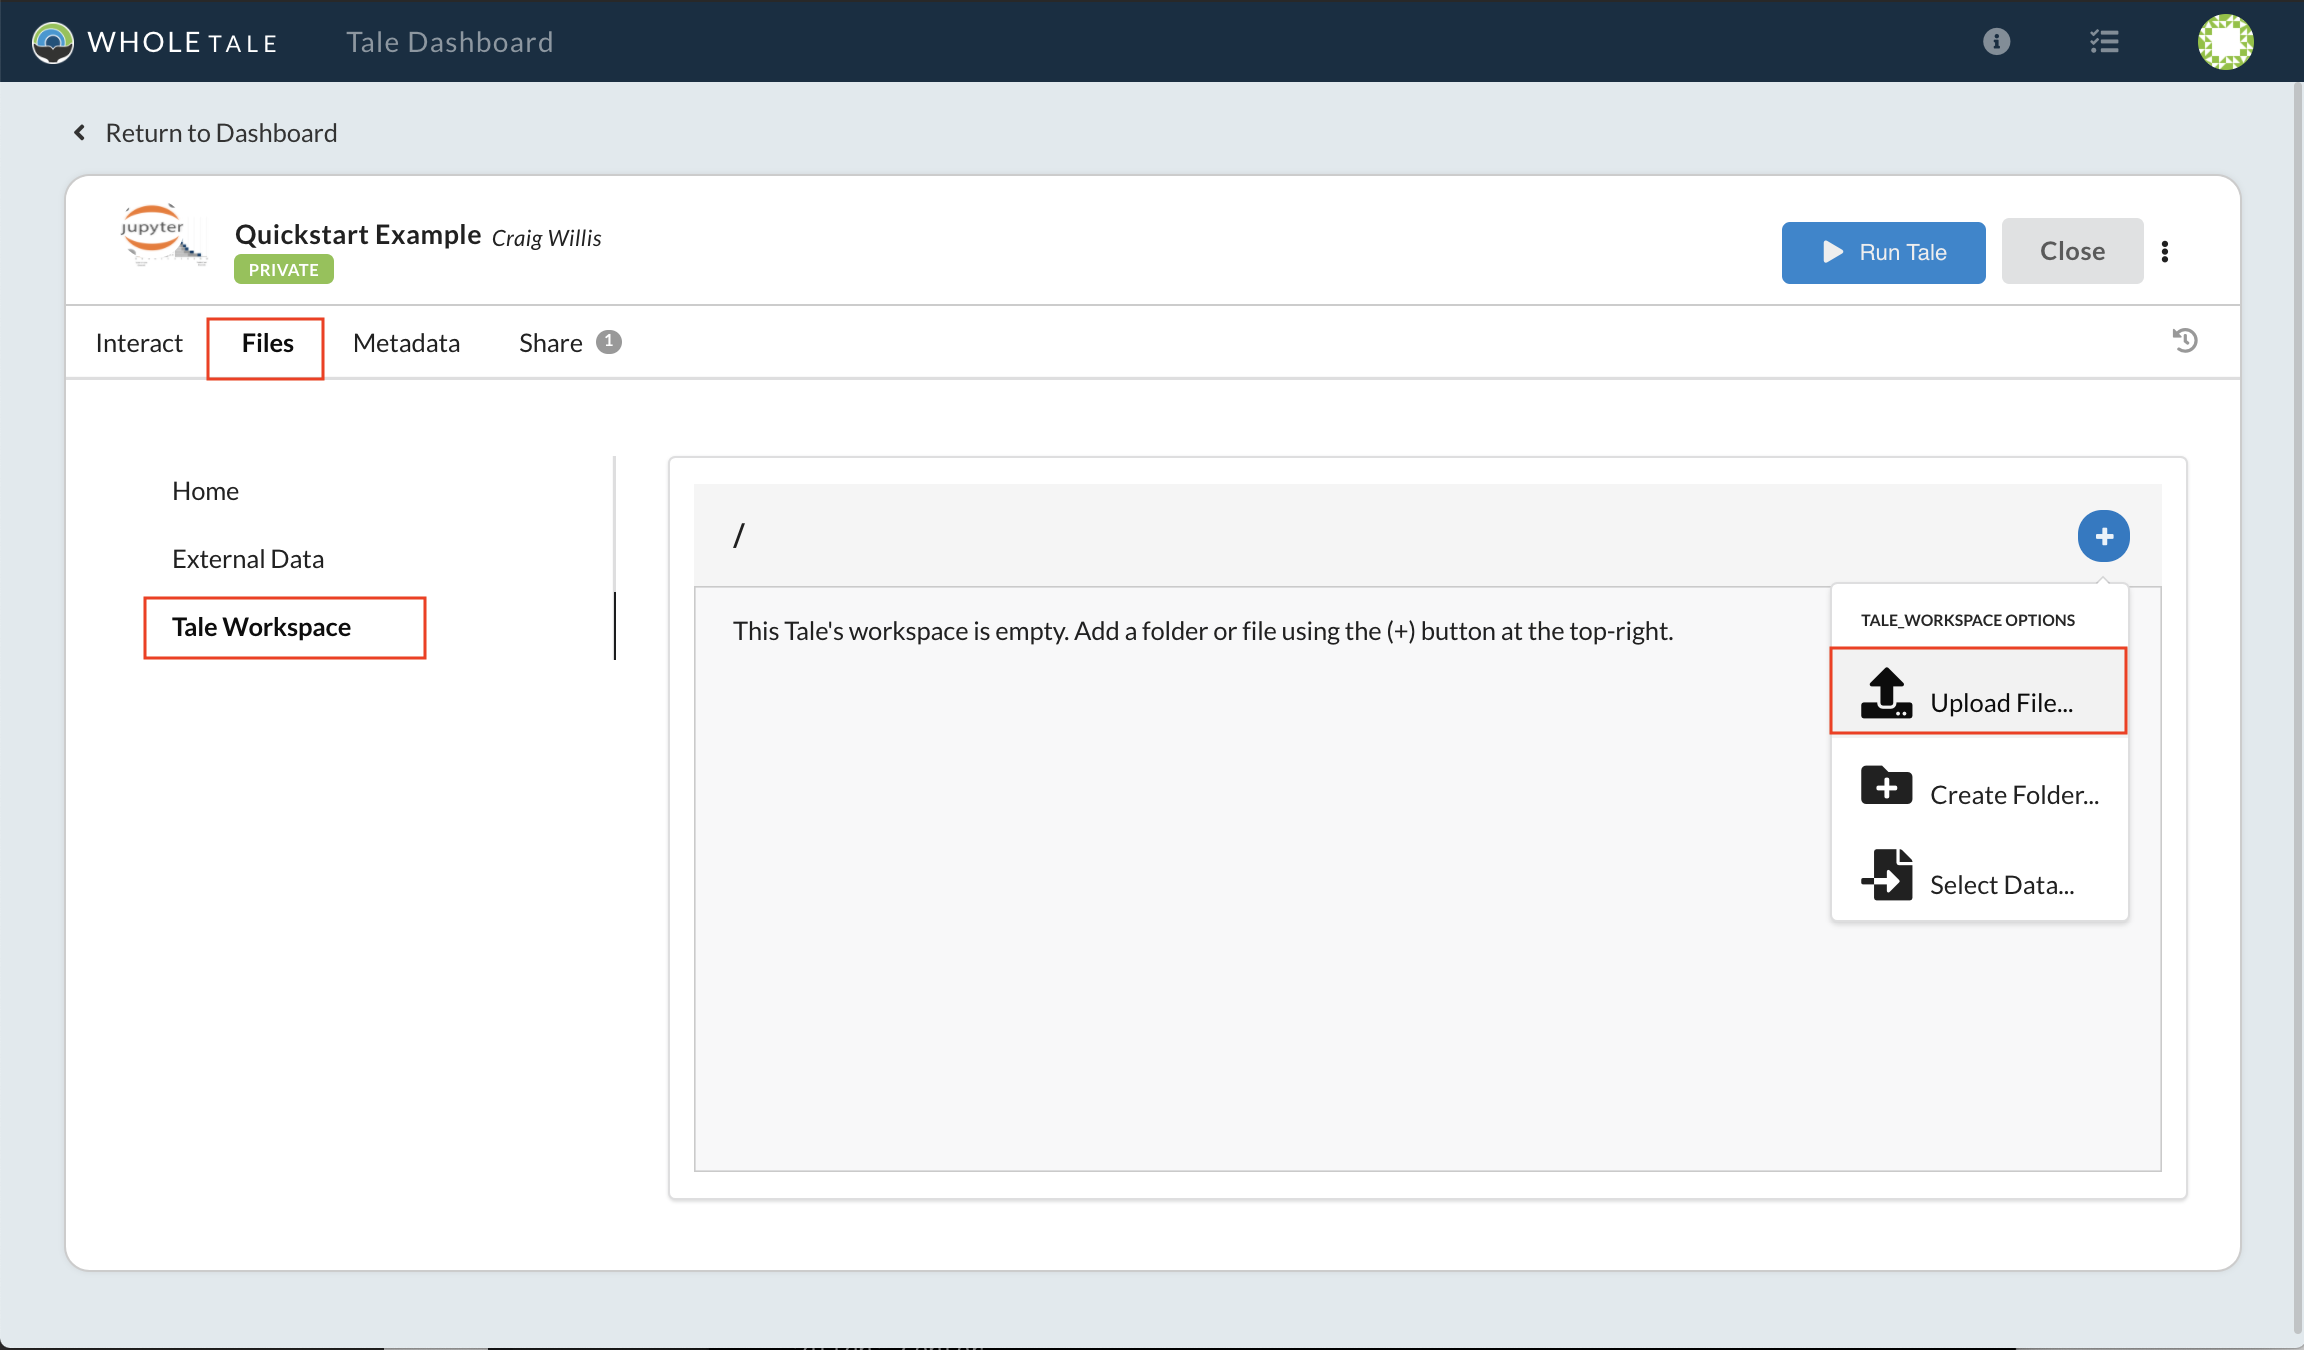
Upload files to your Tale workspace
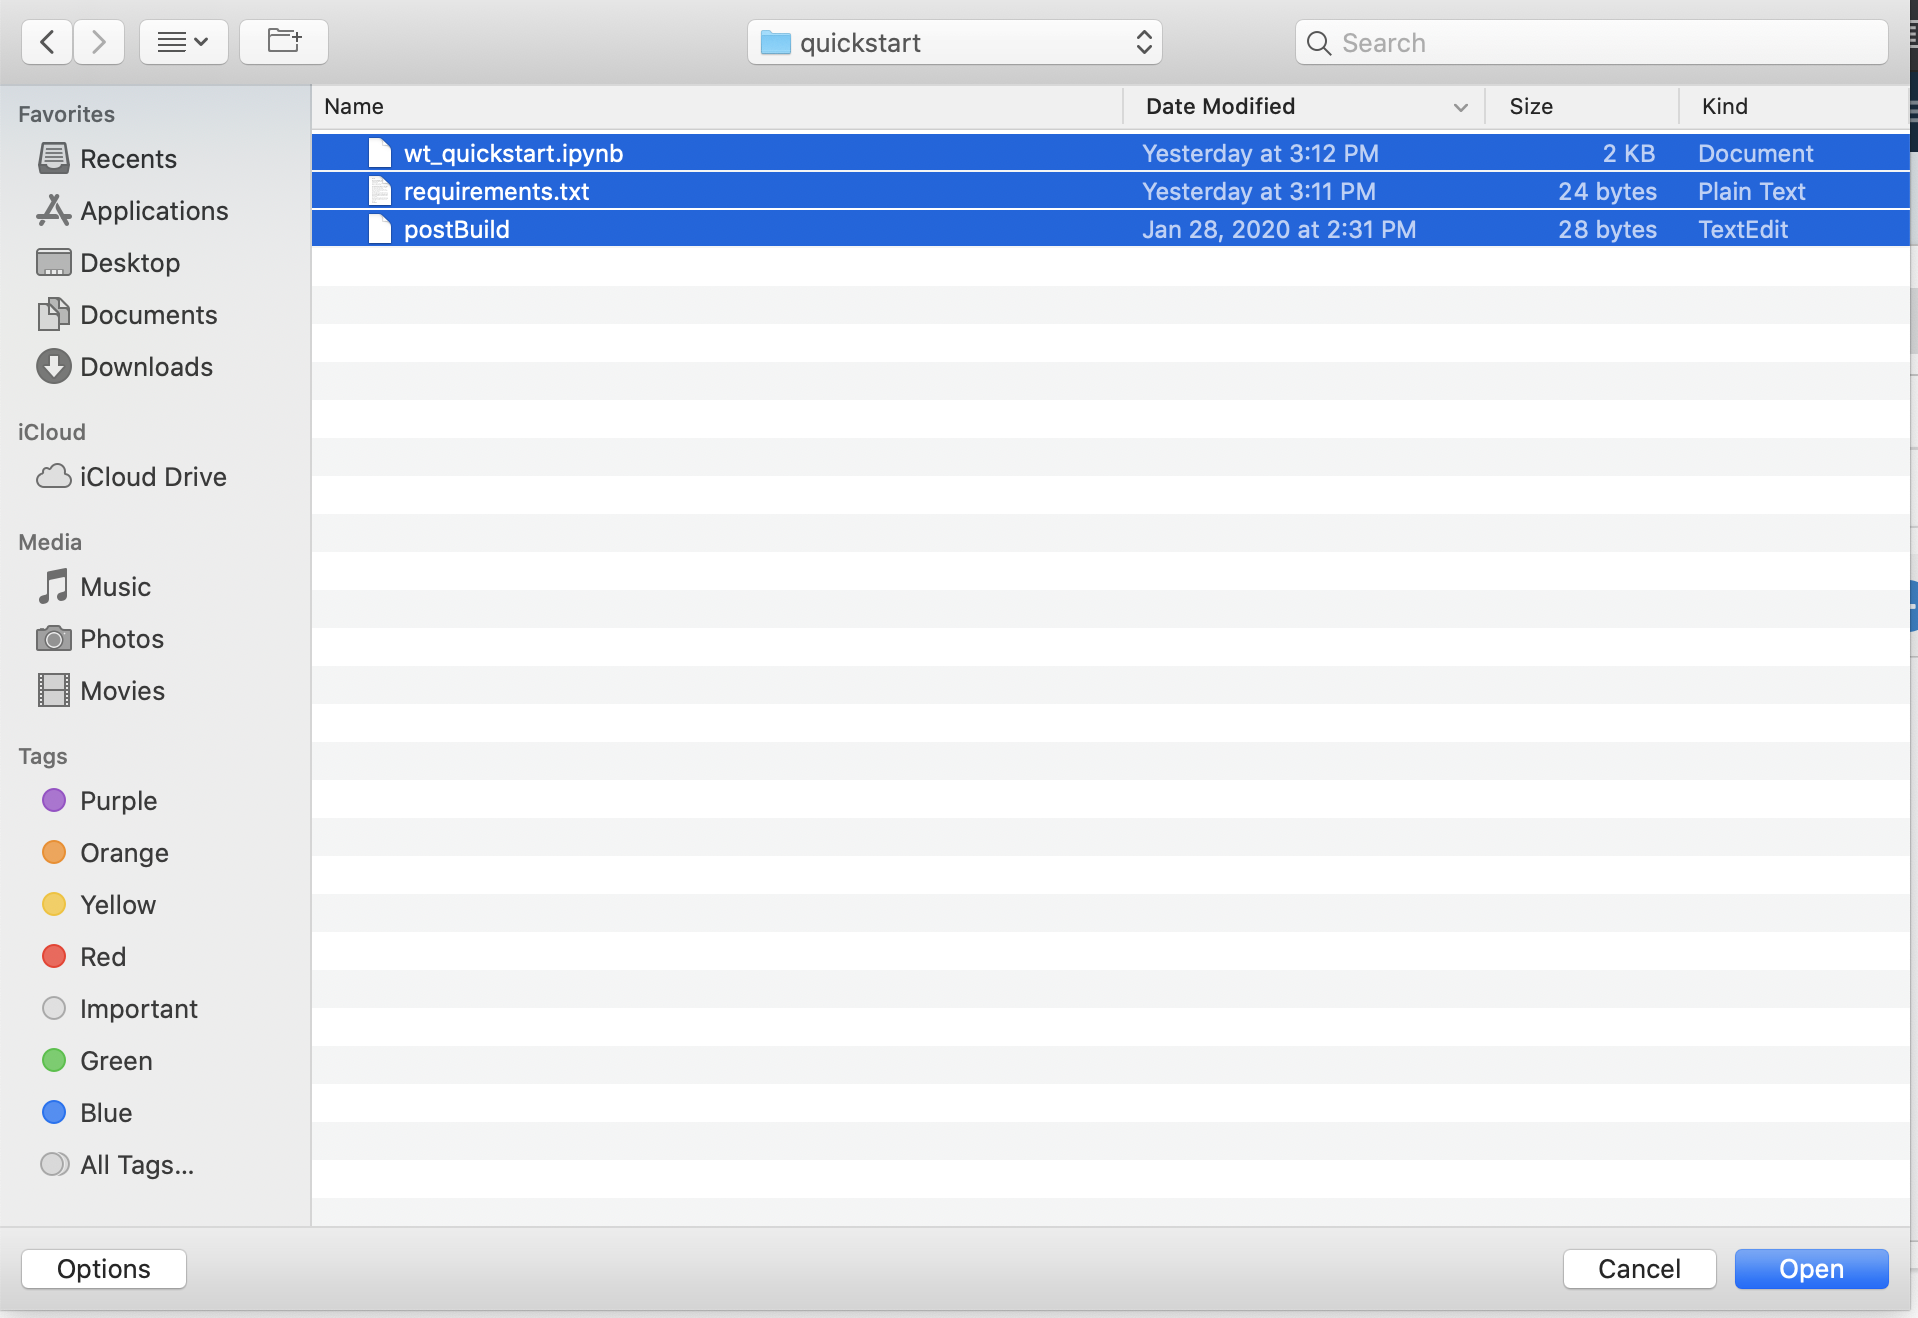
Select files from local system
Select the Run Tale button to start the JupyterLab environment. A notification window will appear with the status and progress of your instance.

Run Tale button

Run Tale progress
After successful startup, the JupyterLab interface will display. Double-click on the wt_quickstart.ipynb file to open the notebook. Select the play button to run the notebook.
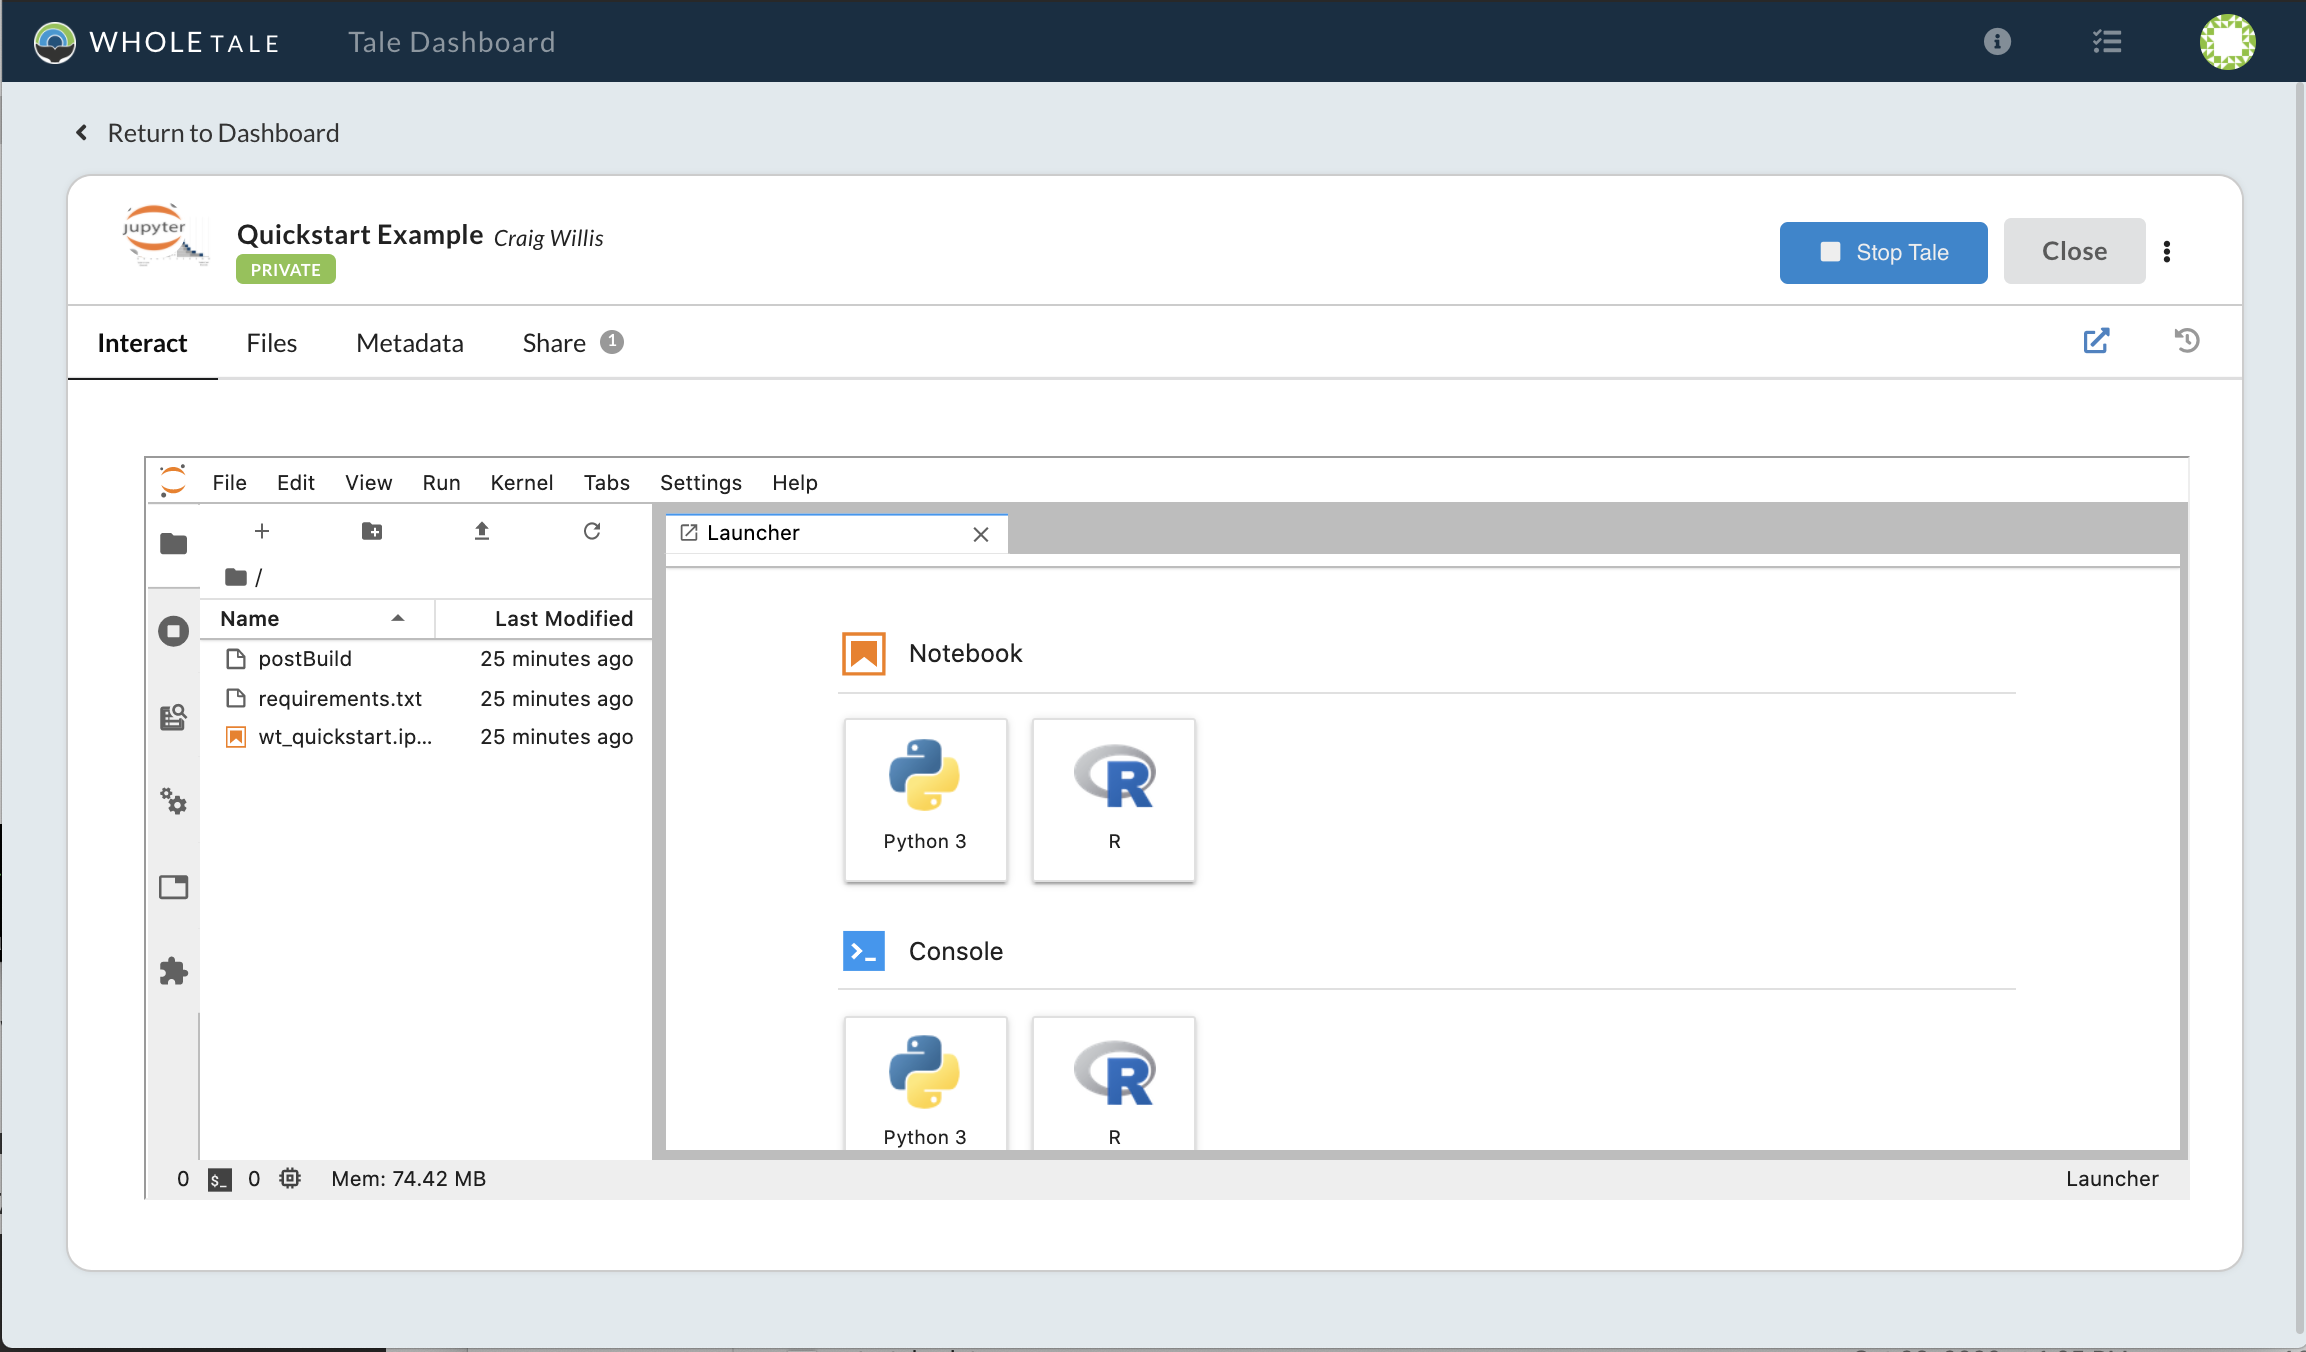
JupyterLab environment
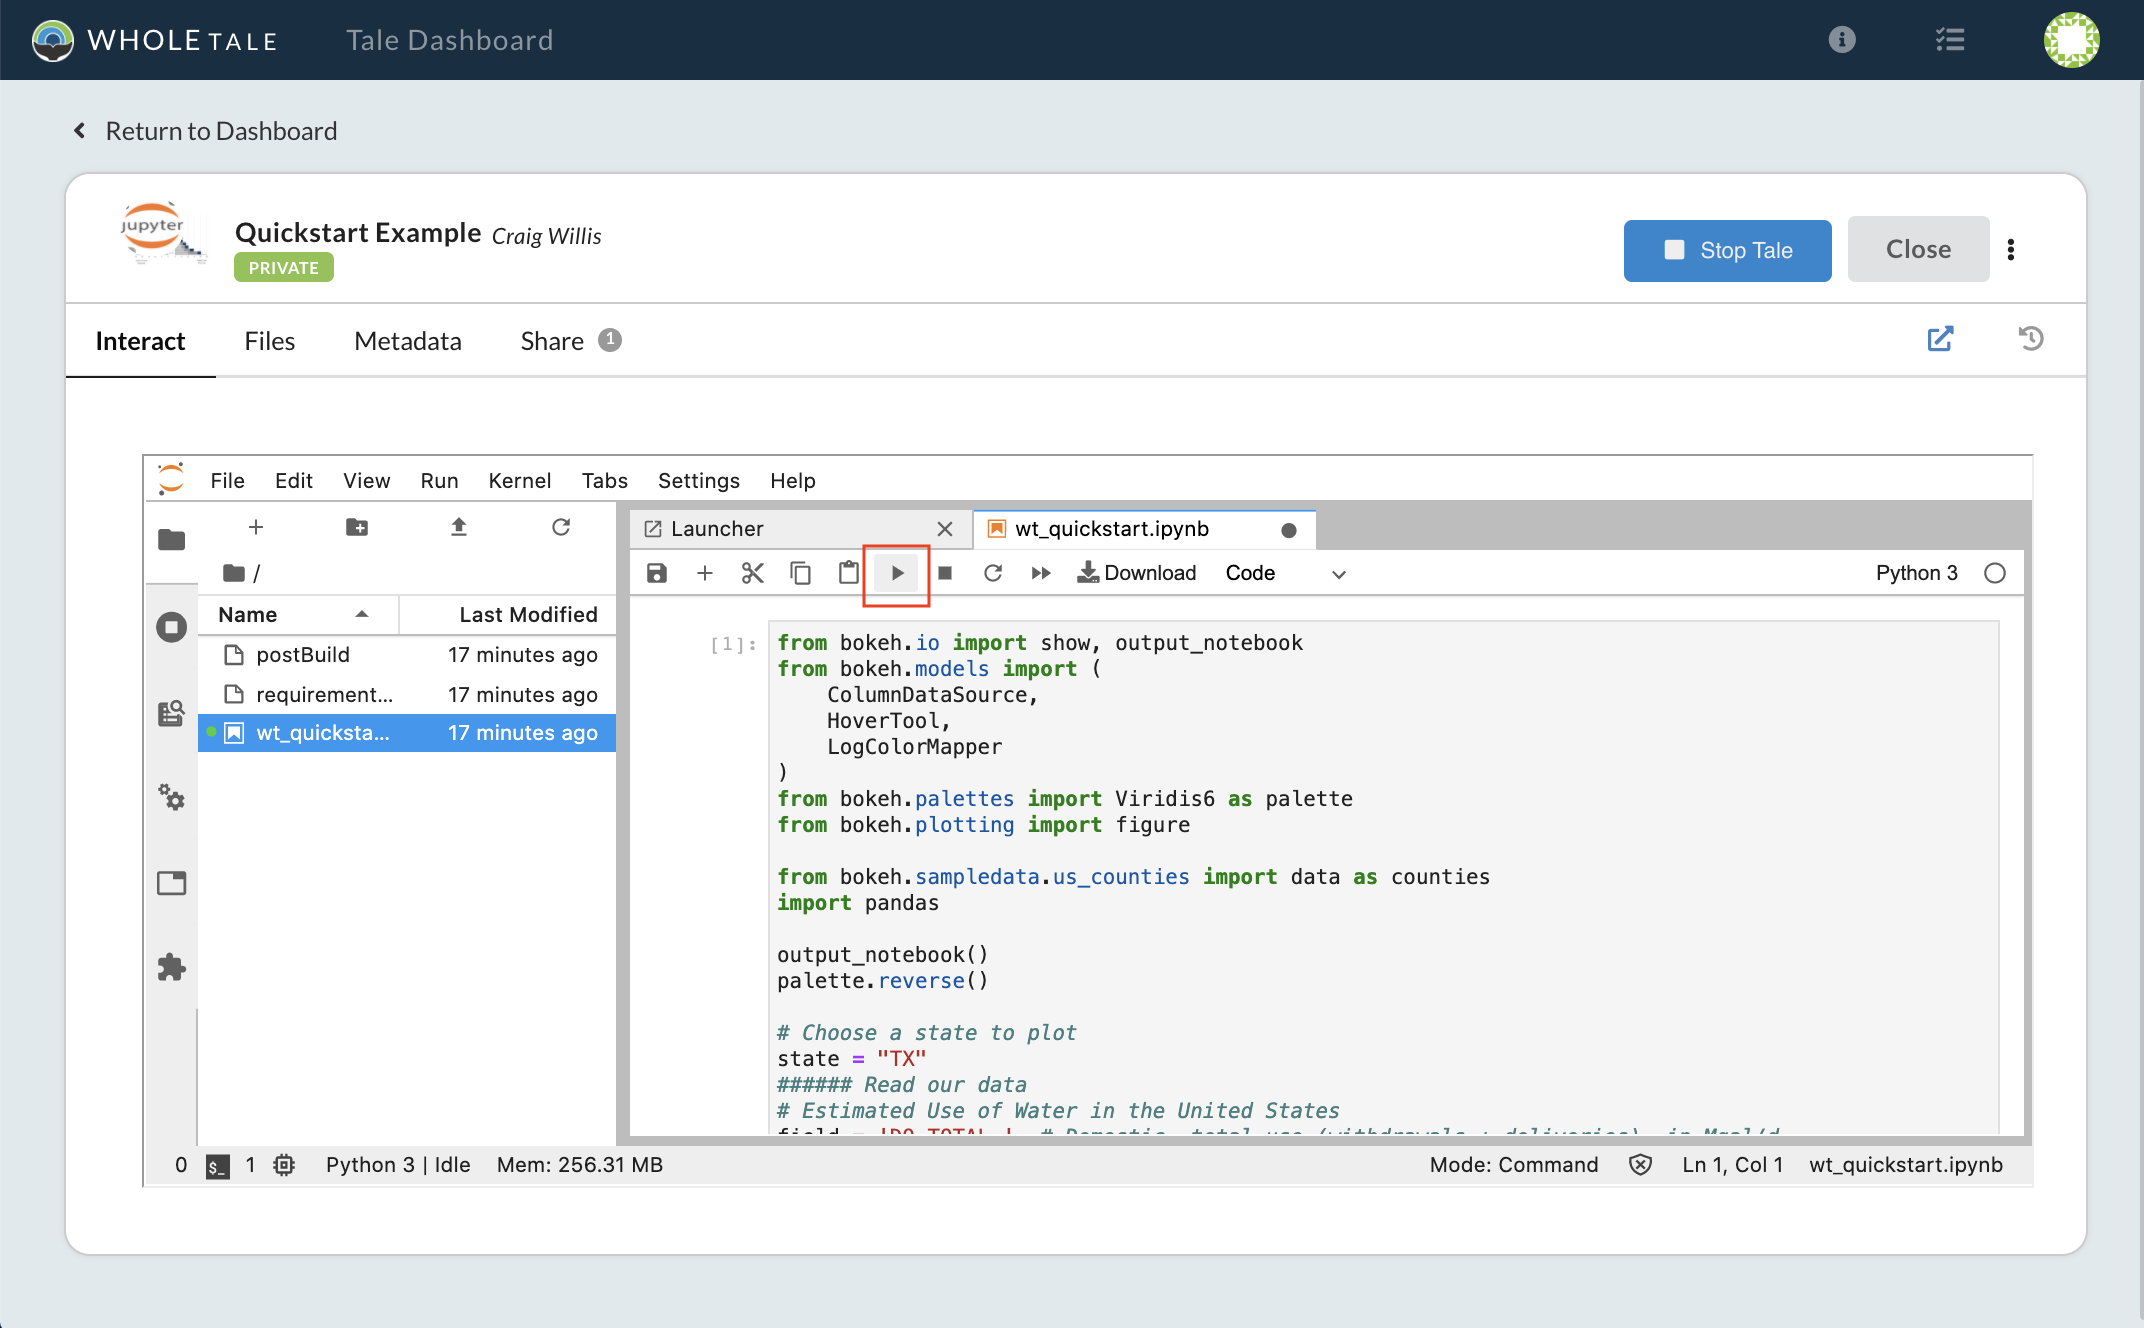
Jupyter notebook
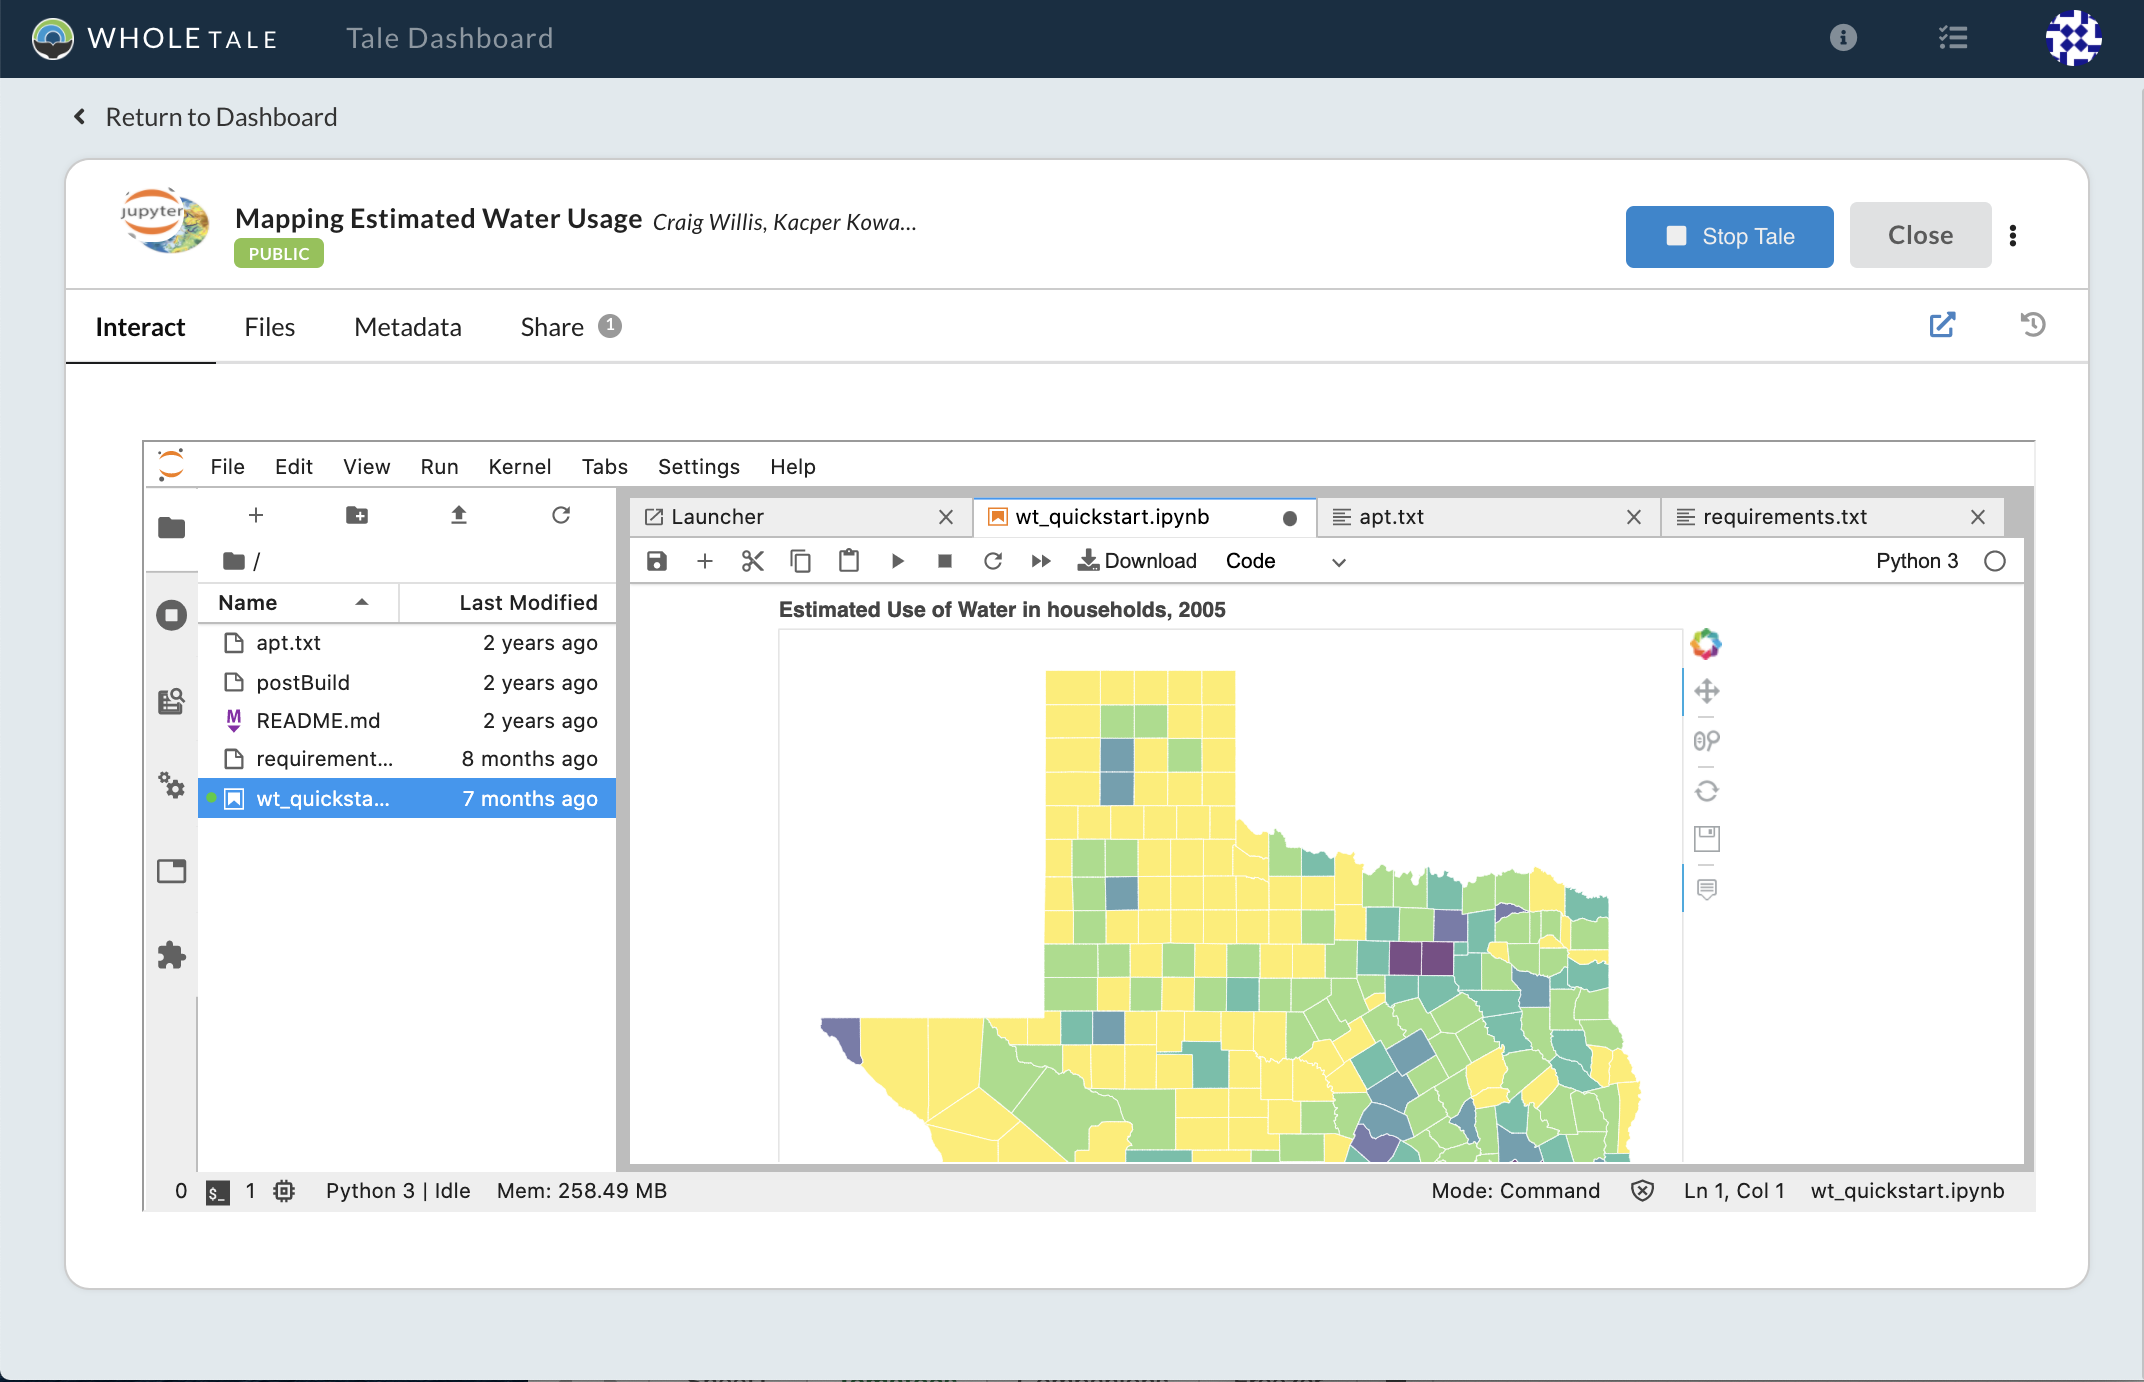
Visualization of registered data
Here’s what happened behind the scenes:
When you registered the DOI, a link to the data in DataONE was made in the Whole Tale catalog, available to all users.
You added a reference to registered dataset to your new Tale and it appeared in the data directory of your running JupyterLab environment.
When you selected Run Tale a Docker image was created using repo2docker. Dependencies were installed based on the provided “requirements.txt” fiel.
You uploaded the example notebook to the Tale workspace. The notebook references the dataset in the data directory to produce a graphic.